


Web Site by cg-photohraphy.co.uk


So you remember that part where I said ‘warts ‘n all’ well this is one of those moments. As I have already stated I purchased the blue wall cabinet from Machine Mart. I liked the cabinet because it’s colour was a match with the colour I was going to paint my bench.
Now for some reason that I don’t understand, and neither did the shop where I purchased it from. To construct the cabinet I had to place the back panel in back-to-front, which was strange? This was not really a problem for me as my cabinet was going to be hung on those steel angle irons, so I had space behind to allow the shelf fixing components to protrude.
However, the real problem was that the shelf fixings were made from what seemed to be ‘bent’ metal hangers? Totally ridiculous for steel shelves that might be used, and definitely in my case for heavy items.
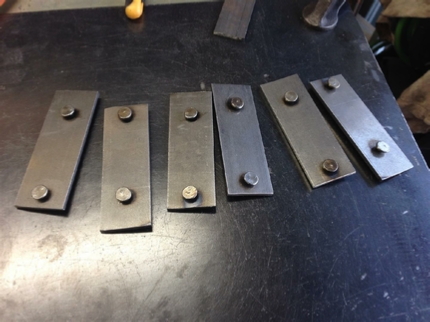
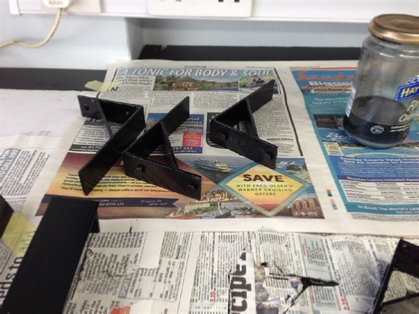
Blue Wall Cabinet Shelf Brackets
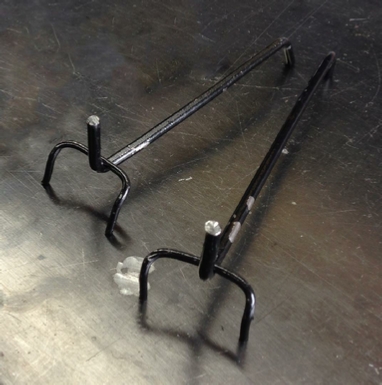
This is what was supplied.
As you can see these were never going to work.
So how to fix this problem?
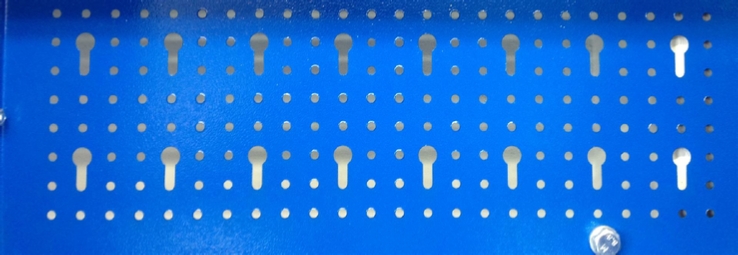
This is part of the back panel of the cabinet, you will see the elongated fixing holes for the shelf brackets.
So what I needed was something that I could place in those slots, so that they would slip down and lock under their own weight.
Now I thought to myself, hang on, I have an idea!
When I was repairing some steel desk brackets, I modified my ESAB to do some spot welding, and instead of making steel pins, I used 4” wire nails, and discarded the heads.
4” or 100mm nail heads were a perfect fit, I cut the heads off in the lathe.
I felt another cunning plan coming on!
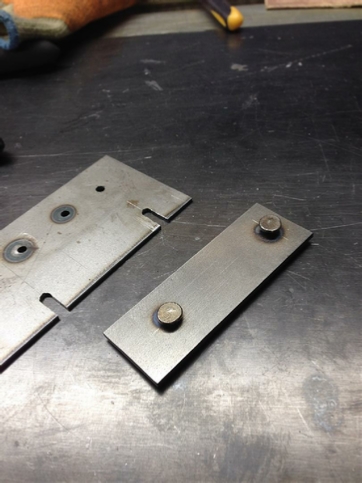
Now I already had an order going in with my favourite supplier The Metal Store so I decided to add some 30mm x 3mm x 3Mtr bright steel strip.
I had them cut this into pieces 13.5cm for the top of the bracket, and 9cm for the back of the bracket, where the nail heads will be welded. See my sketches below.


I used the lathe to cut the nails, total length including the head 8mm.
I converted the ESAB touch and set up my Eastwood spot welding attachment.
I needed to position the nail heads for welding and so made a jig to get the gap set to 2mm.
I started to spot weld the nail heads to the 9.5mm back steel strips, after drilling the holes at 60mm centres.
Notice the depth Jig, to the left?
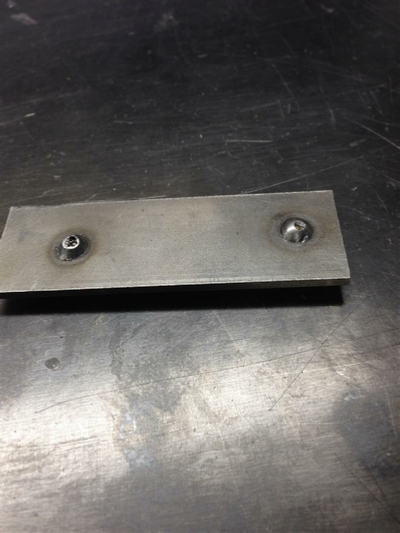
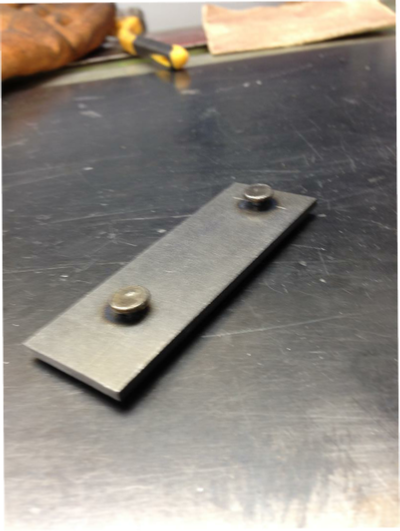
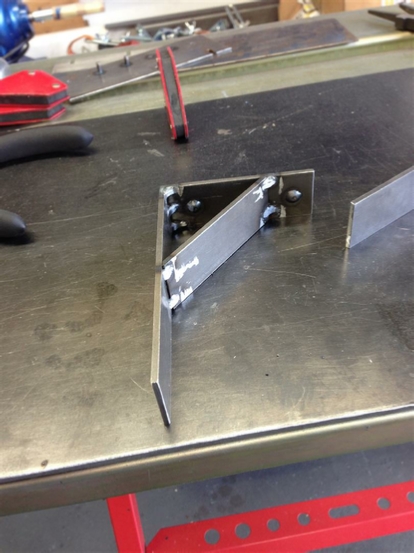
This shows the spot weld and the front of the bracket.
This shows the nail heads that will go though the back of the cabinet.
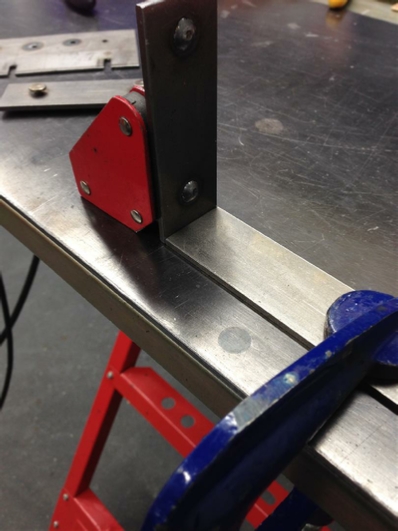
Time to weld the top of the bracket to the back.
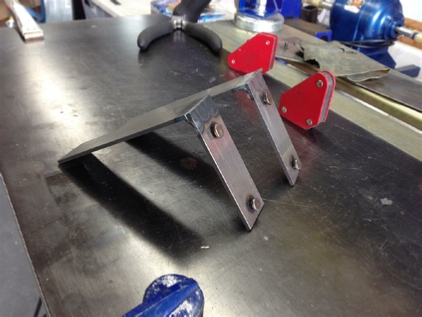
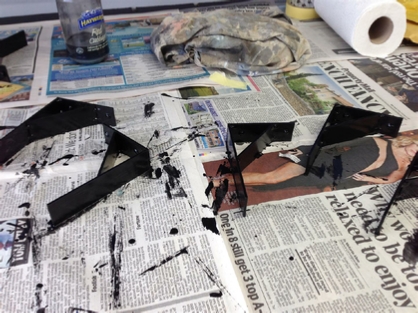
Two part-finished.
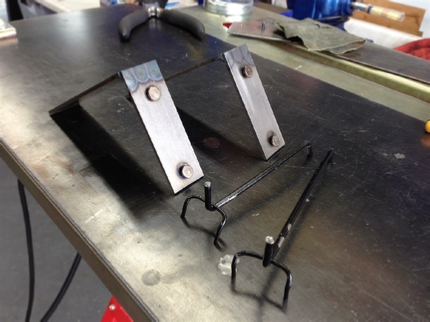
The good v the Bad!
Spot welding attachment going well!
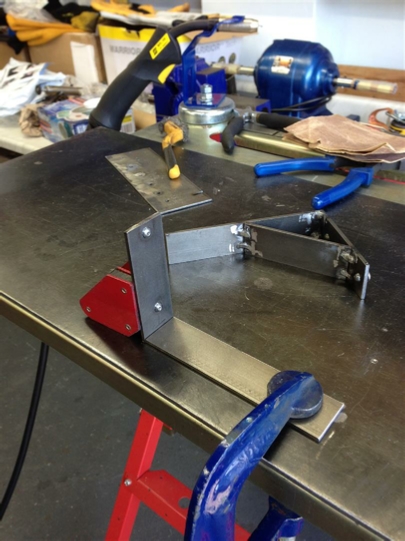
Cross member supports added.
Time for a full test fit, notice that ribbed rubber sheet cut to size for the shelf lining?
Not forgetting, a quick coat of paint.
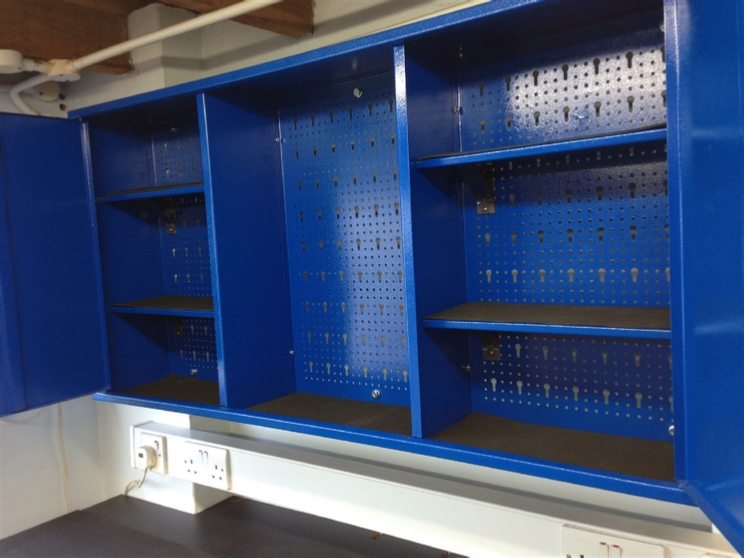
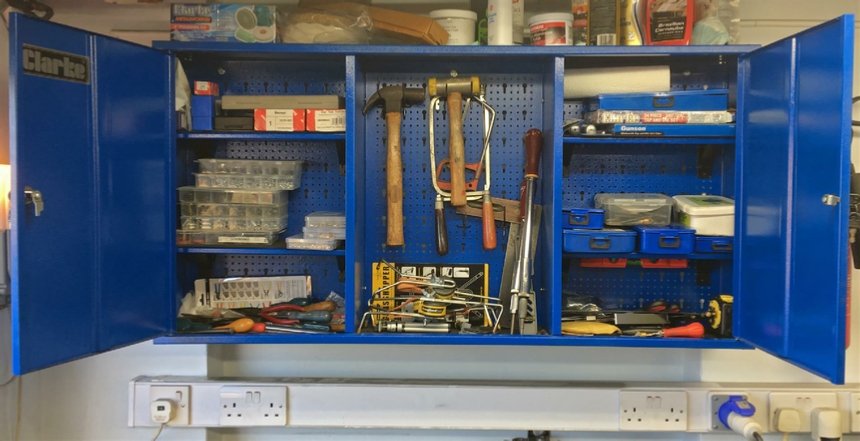
The finished cabinet in use today, note the right hand shelf, with all of those drill sets?
That shelf would never have stayed there using those ‘clothes hanger’ shelf brackets.
However, my steel brackets have worked a treat!
Next project!
 Back to Top
Project Date: 31 May 2017
| Rage 3 Saw |
| ESAB Welder |
| Cros-Arc Plasma |
| HHO |
| Spot Welding |
| Betty's Gates |
| Car Headlights |
| Julia's Dartboard |
| Outside Light Base |
| Weather Vane |
| Geoff's Gates |
| Loft Hoist |
| Colin Laser Mount |