


Web Site by cg-photohraphy.co.uk


This section is not about something I needed to use for my new workshop project. I was working in a school, and we needed to repair some I.T. folding desks. Some of the steel pivot pins for the folding desk mechanism had become loose, and some had even fallen out and got lost! This had happened because of the many years of continuous use, with the desks being constantly opened and closed by the students many times a day, during lessons.
The problem was how to weld steel pins 10mm long by 4.2mm in diameter into 2mm sheet steel panels, without any distortion being caused by heat from the welding process. Worse still making absolutely sure that the steel panels don't get blown though. Because their are no replacement panels availably, because the desks are no longer in production.
Quite a tall order!
Eastwood Spot-Welding Attachment
I think that the original pins were an interference fit, or maybe were spot welded into the panels.
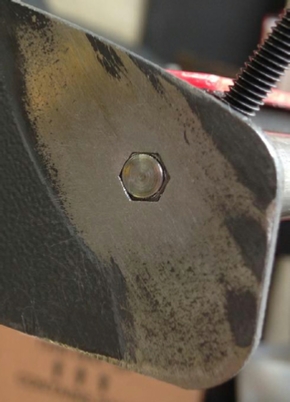
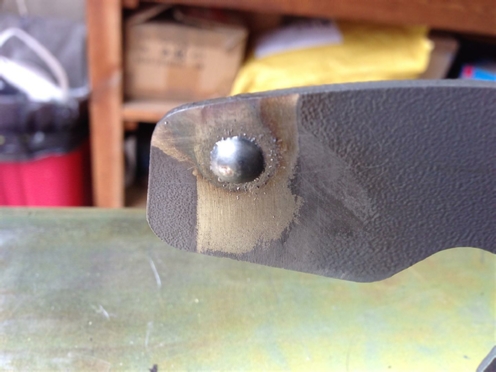
On the left is a close up of one of the original pins, with the paint removed, you can see the hex shape hole punched into the desk panel.
I came up with the idea of using the Eastwood spot welding attachment. Because it would be quick, so less heat, and repeatable also much easier than just trying to MiG weld it by hand.
However, that left two major problems, I had an Esab welder and not an Eastwood unit (my welding shrouds push on, theirs screw on) and second problem, how do you hold a small steel pin, accurately in place while you weld it. Bering in mind that these pins are use as pivots and need to be perfectly at right angels to the panel?
Problem one, remove the adapter from my Esab gun, get a replacement, removing the steel holding spring. Then using a lathe and a screw cutting attachment, re cut the thread on the adapter to allow the Eastwood welding shroud to screw onto it.
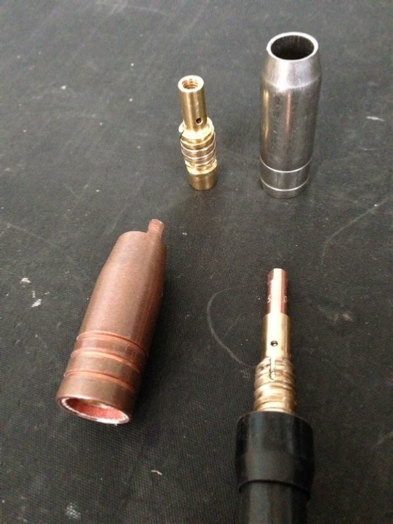
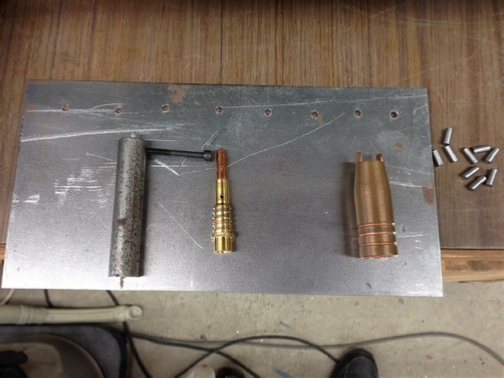
The picture on the left shows, the Eastwood spot welding adapter , on the left hand side, with my original gun adapter top left and my original gun shroud top right. Bottom right is the new adaptor, screw thread cut and screwed onto my Esab MiG gun ready to go.
Some of you may be thinking, ‘why bother with this’, ‘why not just hold the original gun shroud away from the surface’. Well remember what I said about repeatability?. For the cost of the unit, I think it is well worth it.
The only other issue is that Eastwood is an American company, and they don't import into the UK. So I had to contact a very good company called Frost Restorers for the purchase. The MiG Spot welding attachment kit, also contains two drills, and a pair of special pliers along with the screw on welding shroud.
See below, for more information, also check out the two videos.
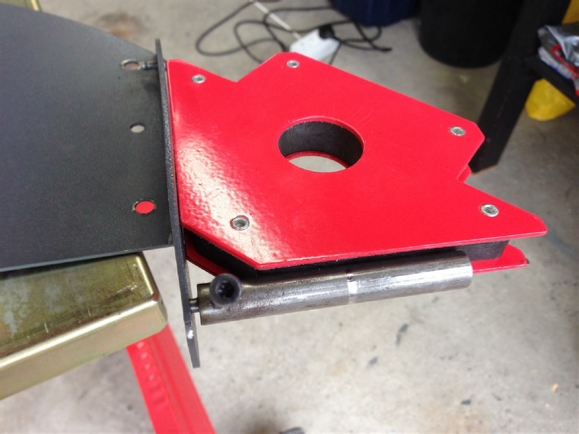
Now onto problem number two. How to hold the pin in place. This one is an easer fix. Make a tool on the lathe and use a right-angle magnet, and as they say on Blue Peter, ‘Here is one I made earlier’.
As you can see. The tool is just a scrap piece of steel with a hole in the end drilled to allow the pin to go in just far enough and be tightened by the set screw. The pins are on the right, and there is a story attached to those pins as well!
I needed to find some mild steel that I could turn in the lathe to the right size, and then weld. Now I have a very good friend call Alan who is a electrical engineer, and when I told him what I needed, he replayed ‘hang on a minute I have just the thing’. He scurried off, and returned some minutes later with a nail!
Now as I said my Father was a carpenter, so I know a bit about the different types. What Alan was holding was a 4” wire nail. ‘Brilliant I cried’. A quick jump onto my favourite auction site, with a purchase of 12 now ‘in-the-bag’, and this is what I used. Turned on the lathe to 4.2mm and parted at 10mm, job done!
And the results!
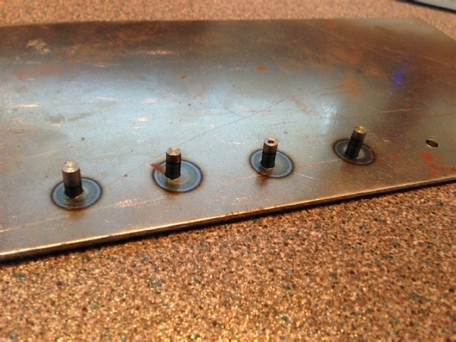
Four home made pins welded onto a piece of scrap 2mm steel plate.
Now for the real thing! Assemble the parts and tools that you need. This should also include and Angel Grinder, with some flap disks I used 120 Grit.
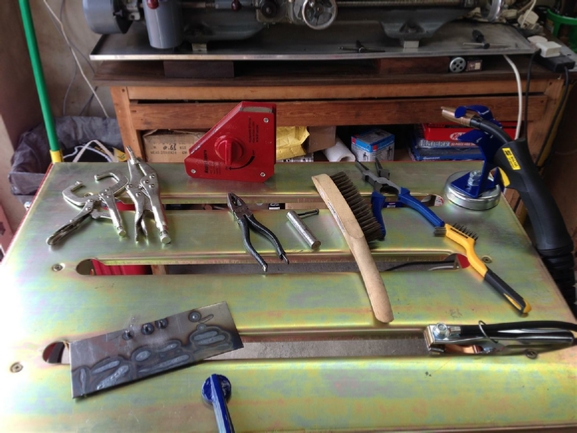
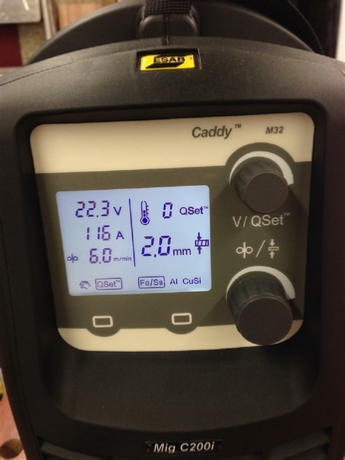
Set up the MiG welder, for current and wire feed.
Clamp the desk panel to the welding table, and grind off the paint, not forgetting to wipe the area to be welded with pre paint to remove any grease, also not forgetting to attache the ground welding cable lead.
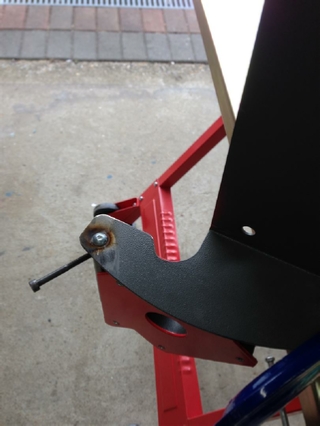
Attache the pin to the tool, attached this to the magnet and set the right depth in the desk panel.
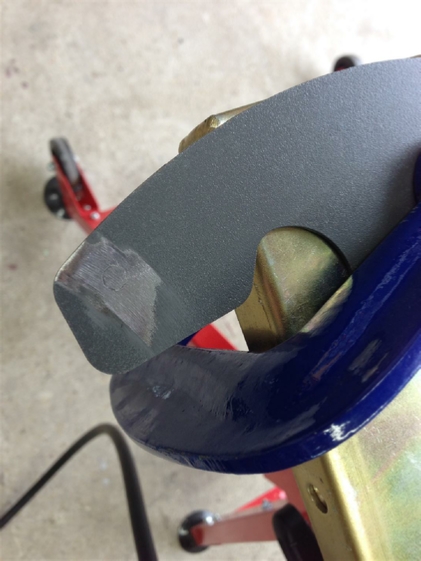
Finally the time has come, and after 2 seconds the job is done!
A final grind with the Flap disk, and the job is a good un.
Then don't forget to paint the surface that you just ground. I found some very special paint by a company called Rawlins. This is the paint that I use to paint my wooden Lathe and Drill cabinets. This paint is so good it does not require any primmer and will go onto bare metal or wood. In my opinion is also much better than Hammerite. I use Rust-Oleum CombiColor. Check it out below.
 Back to Top
Next
Back to Top
Next
| Rage 3 Saw |
| ESAB Welder |
| Cros-Arc Plasma |
| HHO |
| Spot Welding |
| Betty's Gates |
| Car Headlights |
| Julia's Dartboard |
| Outside Light Base |
| Weather Vane |
| Geoff's Gates |
| Loft Hoist |
| Colin Laser Mount |