


Web Site by cg-photohraphy.co.uk


This is a strange one! I heard a strange noise during the night, but did not think too much about it. Then when I went out to go into the workshop one of the outside lights was simply hanging off of the wall still attached to it’s wiring.
After some investigation, the base of the light that was attached to the wall, had simply shattered. It was made of plastic! Now I did purchase the lights about ten years ago, but the Electrician fitted them, so I have no idea about what the light base was made of. It does seem strange as the light fitting itself is made from aluminium. Check out the picture below:
Outside Light Base
Project Date: 9 July 2018
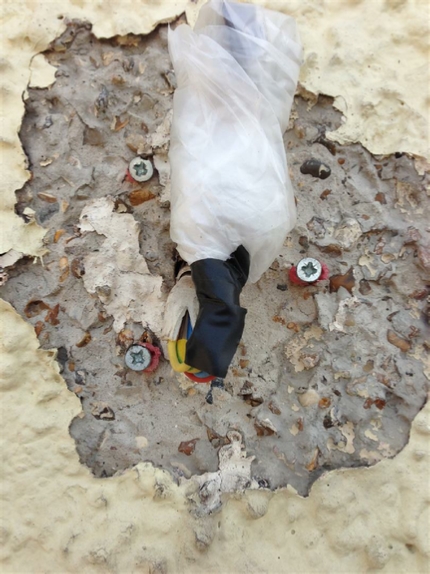
I added the plastic bag over the electrical wires, after adding a terminal block to stop the wires from shorting out.
But as you can see the plastic base is completely gone.
I had already purchased a spare light fitting, so I scurried off into the loft to find it. However, when I did the plastic had already started to become brittle. One of the problems was that I had a further four of these light fittings, attached around the property what happens if some of these start to go the same way? See the picture below:
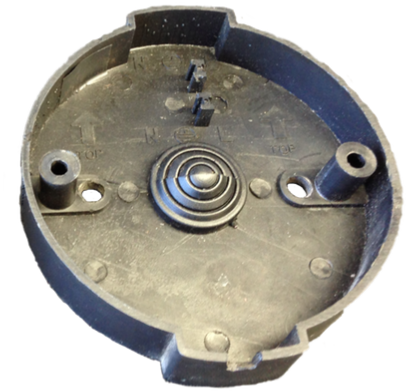
This was the plastic base that was in the loft.
The other one, because I actually had two, simply disintegrated when I touched it. This one was a little better, but absolutely no good to be fitted on the wall and hold a light fitting.
So what to do?
The original light fitting came from Argos, so that is where I went. They still had the fitting, but the size of the base had changed. I purchased a new one and replaced the whole unit.
This solved the immediate problem.
Having a look at the plastic base I was wondering, what happens when the other bases fall apart?
OK, so just go out and buy some more light units, right?
But wait, take a look at that base again.
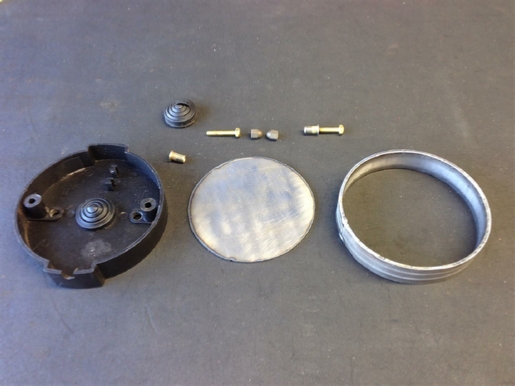
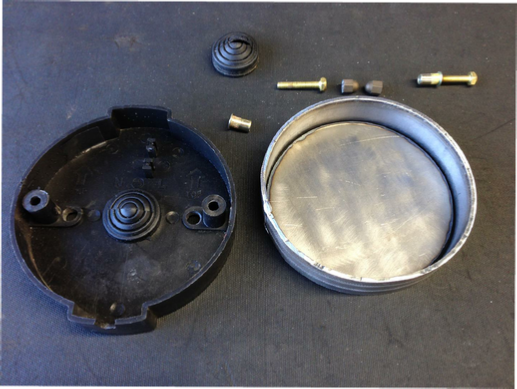
What do we have, a ring, with a base.
Now I feel a Baldrick moment coming on!
I have have a ring roller, and a plasma cutter. What happens it I make a new base out of steel?
It might rust, but it won’t break!
Here is my take on what is needed.
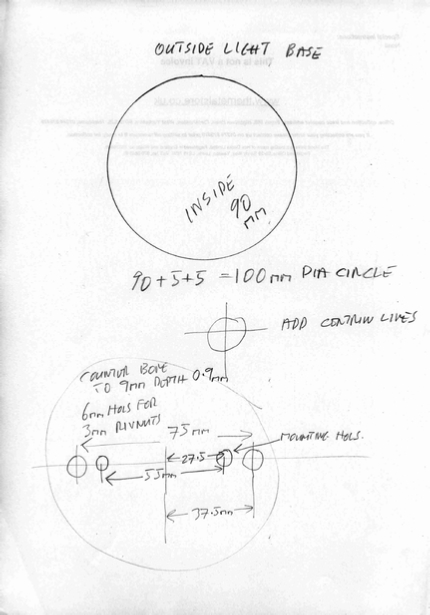
A steel ring 90mm in diameter,
and a Steel plate 90mm in diameter.
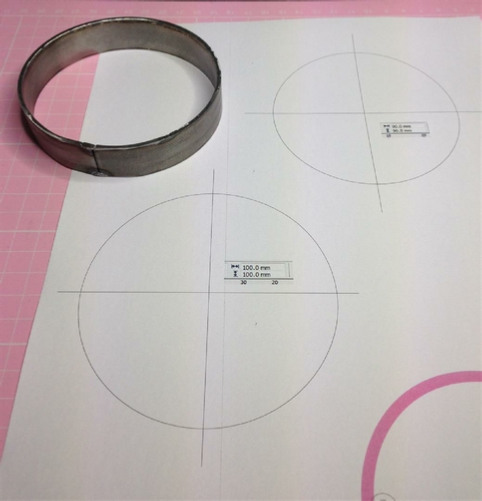
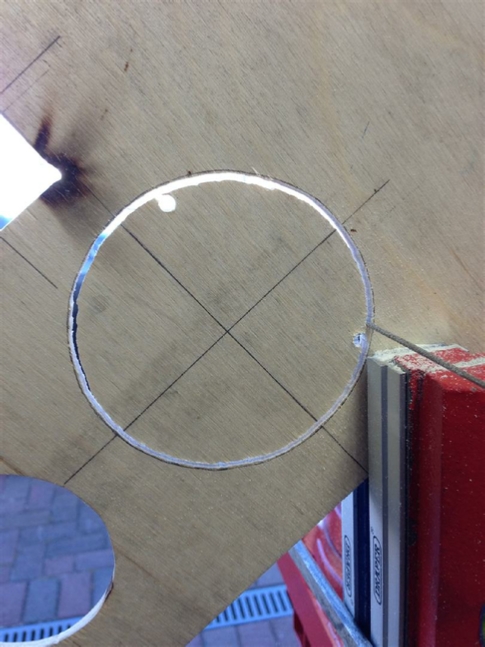
To cut the steel plate which we need a circular template 100mm or 10cm diameter when you include the plasma cutting head size.
So we need to get that plywood out!
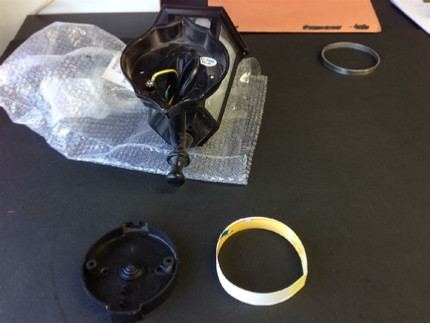
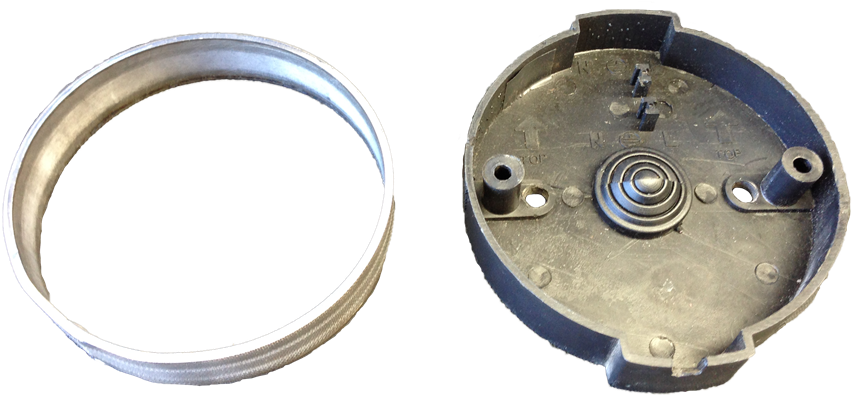
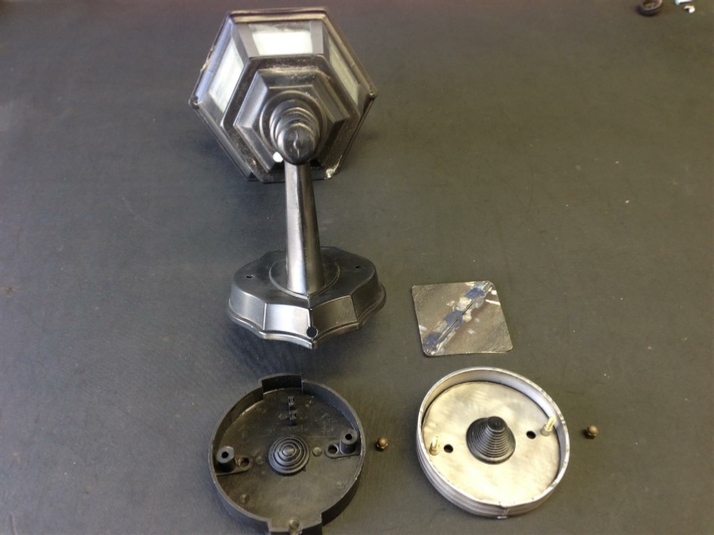
The original light fitting is at the top of the picture.
The original base is on the left, and a paper template giving the diameter for the steel ring is on the right.
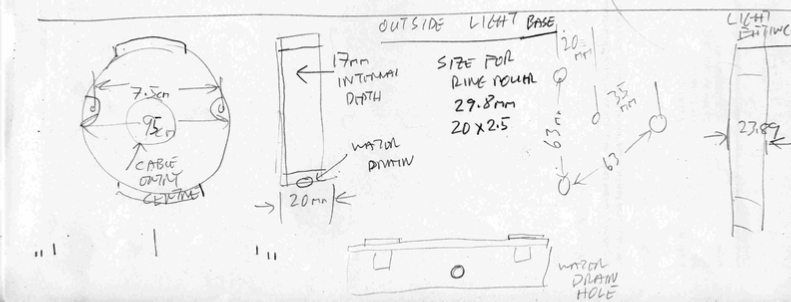
First of all we need to have a piece of steel for the ring. As you can see above what we need is a length of 29.8mm, with a width of 20mm and a thickness of 2 or 2.5mm. So let’s get this sorted.

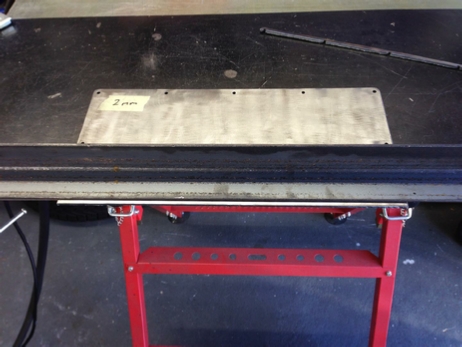
I found a piece of 2mm steel, and then fired up the trusted Cros_Arc plasma cutter.
Also got out a piece of steel angle iron as a guide.
A quick cut, to remove the front of that steel sheet with the holes.
Reset for the 20mm cut.
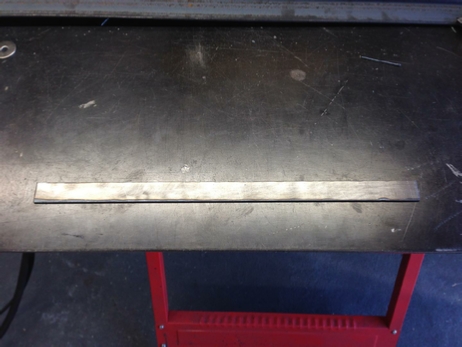
No problems for the Cros_Arc two quick cuts and a trim to length of 29.8mm.
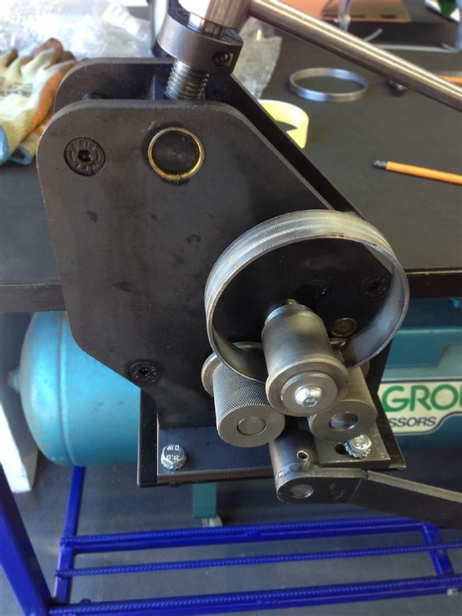
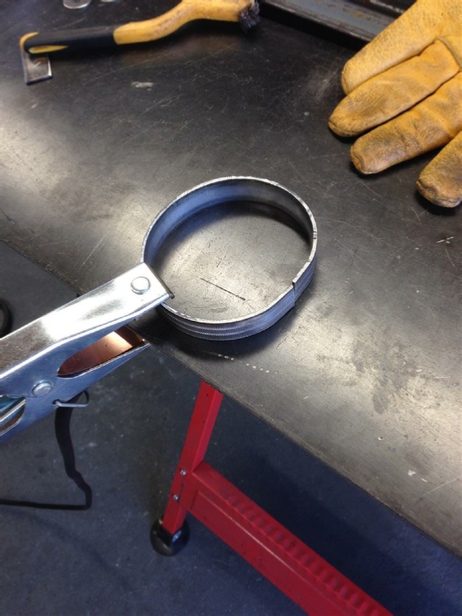
Job done and ready for the Ring Roller.
A quick whiz around the Ring Roller, just don’t go too far.
Stop just as the ends meet.
What I do is then do a tack weld, to hold the ends in place.
Notice, that where the open ends can’t go through the roller, they remain flat.
However, that is soon fixed, when the end are welded.
It’s back into the roller, not too much pressure or you could break those tack welds.
Here is the steel ring fresh from the Ring Roller, with the plastic base along side.
Wow! What a perfect fit.
It just goes to show what you can do if you try!
You can now see the ring at the top of the picture, we now have to plasma cut the base. For that it’s back to the CAD/CAM for the circle.
The measurement transferred to the plywood which is then cut out. Remember to add the extra 5mm x 2 to the diameter to allow for the plasma cutter head.
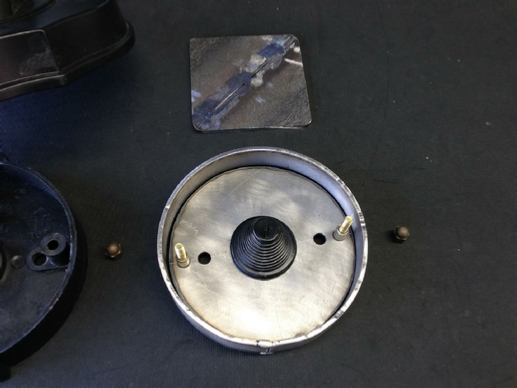
The steel plate now cut out, and pictured next to the ring and the plastic base.
A good fit, notice the new plastic wire guide and seal?
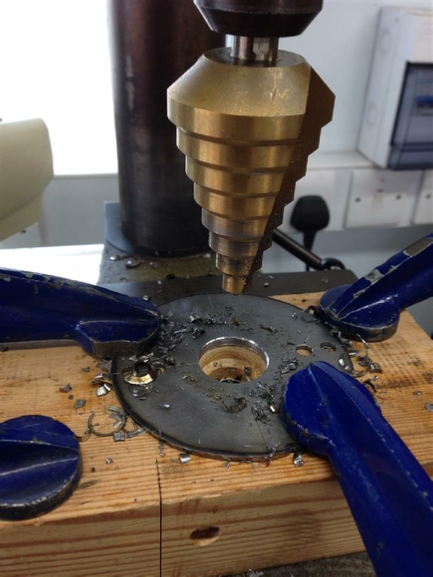
We need the step drill to make the hole as it is quite large.
The wire seal now fitted. All that is needed to some way to attach the light fitting from the top.
The eagle eyed among you will have already stopped these Rivnuts.
Placed in from the rear, they will give a very secure fitting.
I also decided to use brass screws, as I did not want the outside fitting brass nuts to seize onto the screws, which they might do if they were steel.
All that is needed now is is that the base steel is welded to the outside ring and the job is done. It means that I can now create some spare bases, should any more lights decide to fall of the outside wall!
This was an interesting project, because it shows what you can achieve with a little bit of thought and a bit of design skill, whether you want to or not, is up to you to decide.
| Rage 3 Saw |
| ESAB Welder |
| Cros-Arc Plasma |
| HHO |
| Spot Welding |
| Betty's Gates |
| Car Headlights |
| Julia's Dartboard |
| Outside Light Base |
| Weather Vane |
| Geoff's Gates |
| Loft Hoist |
| Colin Laser Mount |