


Web Site by cg-photohraphy.co.uk


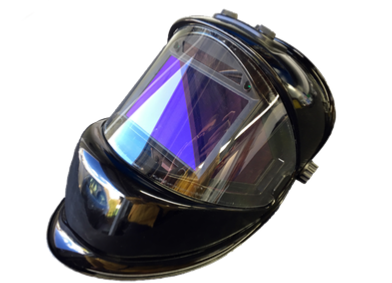
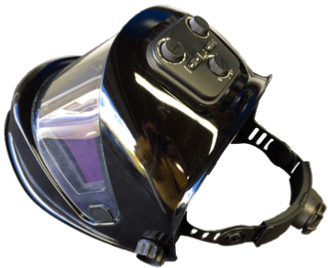
Now I found the helmet, above, on the Eastwood website in the USA. Frost in the UK import a lot of equipment from Eastwood in the states. So decided to give it a try. It is billed as ‘Eastwood Panoramic View True Colour Welding Helmet’ quite a mouthful, but is it any good?
Well in a word yes! Excellent in fact.
The Eastwood Panoramic Welding Helmet features a true 180 degree viewing area with True Colour Technology. It allows a realistic colour perception, bringing colour to the world of welding.
- Extra large viewing area
- True Colour Technology allows a colour realistic perception
- Optical Clarity 1/1/1/2
- Truly auto dimming across all three filters
- Main viewing area can be dimmed from shade 3 to 12
- Side filters are auto dimmed to shade 11
- Lens auto-darkens in 1/10,000th of a second
- 4 Independent ARC Sensors with adjustable sensitivity and delay controls
- Extended throat guard for protection
- Grind Mode
- CE ANSI and RoHs certified
View full spec .pdf file here or view the Frost website or check out the video below.
Equipment
I decided to use this page to show the equipment that I have purchased but not modified yet!.
But first of all I will show you the basic tools that I have, some of them a little bit special.
I have tried where possible to place hyperlinks into the text, to either take you to the manufacturers’ website or to where I purchase the item. So lets get started with drills.
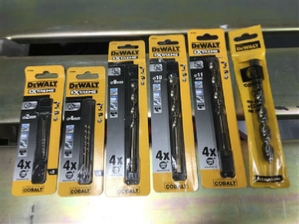
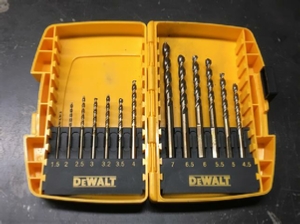
Drills, most of my work is on steel, and I prefer to use Cobalt drill sets from DeWalt. Now you can purchase cheaper drill sets from some of those shopping channels on TV. I am sure we have all been persuaded by the those videos of someone cutting all manner of things and then holding the drill bit on an angle grinder, then using the drill again with no effect on the performance of the bit?
However, when you are working on a project that you have centre punched with an optical centre punch to a ½ mm accuracy, and you have multiple steel pieces clamped on to your drilling machine, you have to know that the operation you are going to perform is going to work first time. Because if you get it wrong not only have you wasted time on the project so far, but also the material cost.
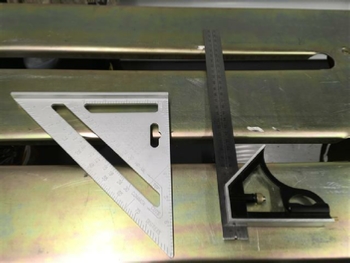
A welding square is very useful for marking out and checking sq before welding, normally make from aluminium so they don’t get stuck on the magnets you are using to hold the steel in place.

To date, these drills have never let me down. My advice is buy them.
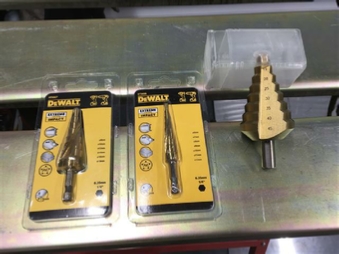
As you can see I also have some impact step drills, also DeWalt.
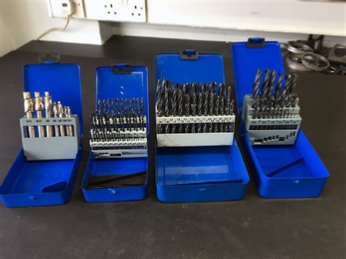
Now I do have two or three set of HSS or High Speed Steel drills. Both Metric and Numbered. But they do not cut mild steel anywhere as good as Cobalt. These drill set were purchase from UK Drills.
Also notice the set on the left of the picture these are rebate counterbors this set have front pilot guides to centre the drill. These are really for use in a milling machine but can be used in a slow drill press. These were used when I built a quick release bench mount for my Ring Roller.
Mine were purchased from Ebay see link in the picture on the left.
So whilst we are talking about tools, lets talk about safety. How many pairs of eyes do you have? How many hands and feet? If your answer is two of each, well done. Now that questions is; Do you want to keep them? Again if your answer is yes, that is good! So why do I repeatedly see people working with out safety shoes? People welding be shutting there eyes to tack things (think OCC), and not wearing welding gloves, welding jackets or fire proof overalls. Can you answer me that?

So let me diversify just a little.
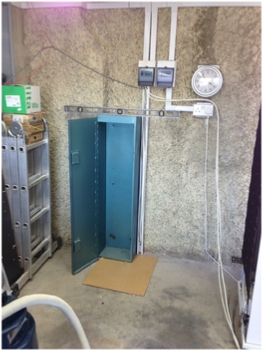
I fitted this blue steel cabinet to the back of the workshop. I was just doing the final wall screw anchors. When I offered the cabinet up to the wall, and then found there was a stone still attached to the concrete floor, which was stopping the cabinet fitting properly against the wall.
I picked up a cold chisel and hammer, and was just about to remove it, when ‘I realised I did not have my safety glasses on’. I thought to my self ‘its only one stone’ but I thought NO put them on.
So putting down both the hammer and chisel I got up found the glasses put them on, and got back in place. Put the cold chisel onto the stone gave the end a whack with the hammer, the stone flew straight back at me from the floor, and hit my safety glasses right in the middle of my left eye.
The mark on my safety glasses is still there today acting as a reminder to me of what could of happened that day. Fortunately my left eye is also still there, as the glasses did their job perfectly.
Please take note, that could have been you, would you have done the same as me? stopped and put the glasses on?????
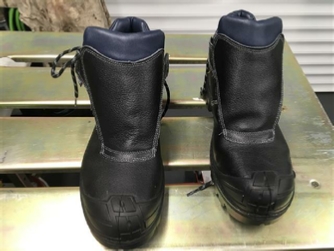
So staying with safety, and welding. What about footwear? When I started setting up the workshop, I realising that I would need to protect my feet. Especially when doing Plasma cutting, so I purchased two things the welding boots below with leather tongue to cover the laces, and a fireproof set of overalls.
So these items were good and bad. The overalls are great in the winter, but not so fun in the summer when the temperature reaches degrees 30C, the boots are also great especially when using the plasma but also not good in the summer heat, they were also very heavy.
So I looked round for another solution, and found these trainer boots. Steel toe cap and steel sole like the welding boots but a lot lighter and more comfortable. Just got to watch those laces. However, they really are my go to shoes for the workshop I even take them with me when I visit my local steel supplier and on to those industrial photo shoots that I do.
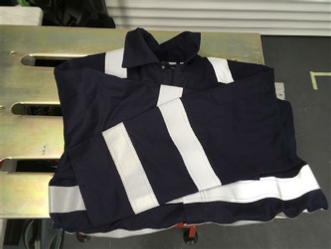
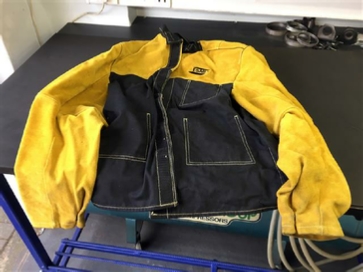
One other later purchase also better for the summer months, is my ESAB welding jacket, absolutely great for slipping on overtop of the shorts and tee shirt in for that quick welding job, and then take it off before it gets you too hot.
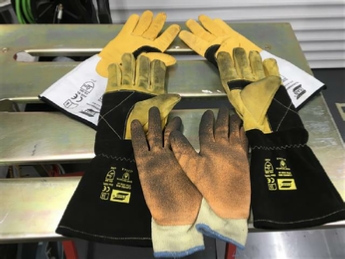
So what about gloves, I tend to always wear builders gloves, 37 years of I.T. means my hands are to soft to work on steel without them, and as far as wood goes, I only have to look at a piece to get splinters!
For welding as I only do MiG, I purchased the arc gloves, but found them to be too thick to work in comfortably, so purchased the thinner TiG gloves which I also use for plasma cutting.
Now another word of warning, again I have seen people doing MiG tack welding and plasma cutting without using gloves. A bad thing to do. Any electrical arc will produce a vast amount of ultra violet radiation, the kind that will give you Sun Burn. However, that much radiation over any prolonged length of time can give you skin cancer.
I know what you are thinking ‘yet another warning of doom’.
However, this one should be listened too!
So continuing the theme, lets talk welding helmets, and no just shutting your eyes, it’s not a good way to go.
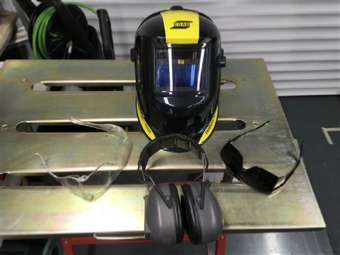
I purchased the ESAB helmet first of all. It’s good but has a green/yellow tint, which makes things look a bit dark, it also only goes down to a shade 9. Sometimes if I an using some 0,6mm wire and running low current I find this too dark and would prefer an shade 8.
The glasses on the left are my standard safety glasses, the ones with the stone mark.
Centre front a pair of ear defenders, these are electronic the type used for shooting guns. If you are working with someone else and using a grinder or power saw they can be a help allowing you to communicate much better.
Lastly the darker glasses are a shade 5 used when I do plasma cutting or for use when doing oxy-acetylene welding. As no U/V is produced, they do not have to be too dark.
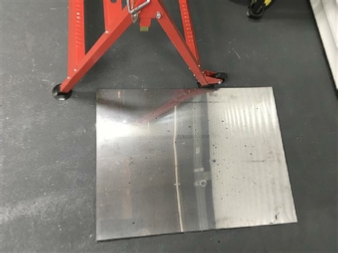
So going back to more mundane things. I decided to try to protect my nice newly painted floor from hot plasma cut metal and dross. I decide to purchase a stainless steel splash back sheet. Which I can place on the floor before plasma cutting. So far so good.
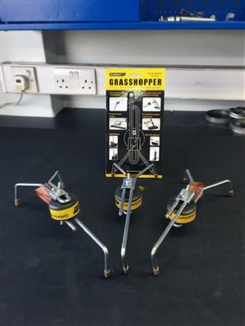
Grasshoppers, no not the sort that you eat in Thailand these are for holding parts before welding, sometimes called a third hand.
I used these very successfully when I completed the project of adding wheels to my Evolution saw stand.
These are made by StrongHandTools if I remember rightly I had to import them from the USA. Not cheap but specially designed for welding with heavy copper braiding to conduct the current.
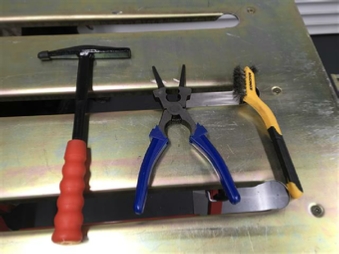
Tack hammer on the left, good for dross removal after plasma cutting, also if you do any cast iron welding you my need to do some peening.
Standard MiG pliers, good for cutting off excess MiG wire, although I tend to favour using a pair of side cutters myself, the other important use for these is cleaning the MiG nozzle of splatter. If you don’t attend to this the gas will not give you a good coverage. So keep that nozzle clean.
Then on the right small wire brush, used to clean up after you weld. Most important if you do any stainless steel welding DON’T use the same brush that you use for mild steel. You will contaminate the weld, and it won’t be stainless any more.
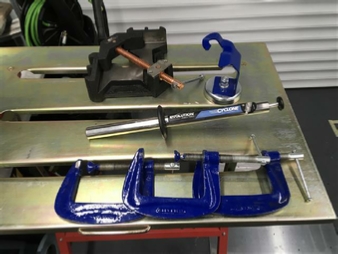
Clamps, top left right angle clamp, very useful to hold steel pieces at right angles whilst you weld them, they cant move so the angle must be 90 degrees.
Top right standard magnetic MiG gun holder.
Centre, Evolution magnetic swarf cleaning tool. I also have one of these on wheels for the floor, great for picking up all of that steel swarf quickly.
Bottom, I favour G clamps over any other. Why because you can get them very tight and they don't slip.
Now for some very important advice about drilling holes. Now you might think ‘blah blah stick the drill in the chuck and drill the hole’ come on what could be simpler, right; wrong!
I needed to drill two 10mm holes into a piece of mild steel plate, so that I could use some Rivnuts. Because the Rivnuts have to be compressed after fitting into the holes I needed to make them a close fit.
The first hole I just drilled without clamping the work piece. Very unusual for me. For the second hole I did clamp it down using a G-clamp. So this is the same drill for both holes, and one of my cobalt drill as well. When I came to insert the Rivnuts one fitted perfectly the other one would not go in?????? What was going on, did the drill suddenly go blunt? I took the drill out and checked it. No problem there still as sharp as ever.
So it looked like it was the first hole that was the problem, the second was fine, so it couldn’t be the drill. The only difference was the first one was not clamped. So I clamped the steel plate down and re drilled the first hole again. This time perfect.
So the motto of this story is, always use a G clamp before drilling any holes.
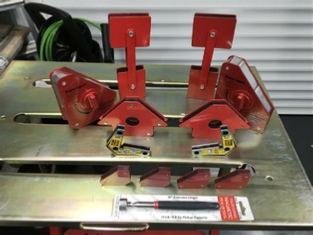
Magnets- you can’t have enough of these large ones small ones inside and outside edge. Just get some!
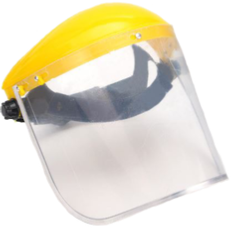
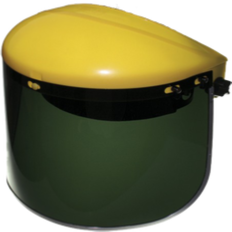
Continuing with the theme of eye protection. Two other visors that I have and use. No links, because there are very standard. The one on the left used when cutting or grinding, especially when using the angle grinder.
The one on the right is a shade 5 I use if I plasma cut, especially if gouging. As I don't want that hot steel hitting my face for obvious reasons.
Now you might be thinking why not use that rather nice Eastwood helmet above, setting it to grind mode. Well for one thing it is heavy to wear in the summer, and the shade 5 visor still gives better visibility.
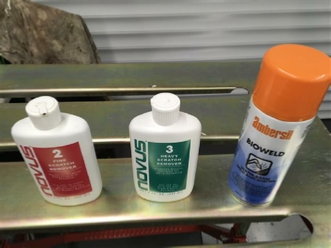
What about keeping those visors and helmets clean, and stopping that hot metal sticking to the visual surfaces. I use Novus acrylic polish, available in three grades. I purchased a kit, course, medium and fine with a set of cloths, from Ebay.
The other welding product on the right is an anti splatter spray. I use this inside the MiG nozzle to stop the build up of splatter affecting the gas flow.
Talking about keep the MiG nozzle clean here is something that is really good and something you may never have heard of. How about a ‘MiG nozzle Cleaning Tool’. Difficult to find and prices vary this one from Weldability. Excellent tool works much better that MiG pliers, in my view.

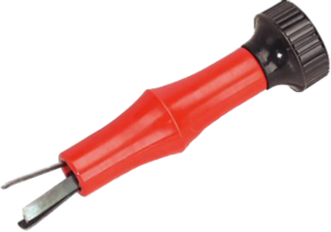
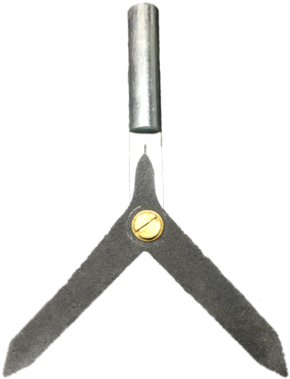
How do you get rid of the pesky weld splatters, you know those annoying little BB’s that just seem to appear out of nowhere and go right where you simply don't want them to go. How do they know how to do that ! I tried all sorts of things, including a sharp screw driver. Then I found this. Build like a Brick S*** House. Hit it with a hammer all day long. Hardened blade. You can buy new blades, even get them in different types.
Don’t think about it, just get one! You will never regret it!
Got mine from Metal Fabrication Supplies
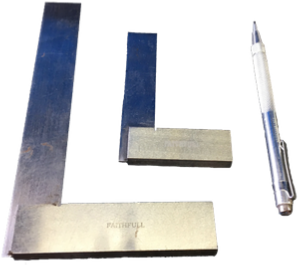
Set squares these are Faithful If I remember 6” and 3” very good quality, you can get them just about anywhere, purchased mine separately can be found in sets these are on E-Bay.
The scriber is also a bit special its a Moore & Wright with Carbide-Tipped replaceable tips. This was a recommendation and can be found on Amazon.
Tools that are quality will cost, and you have to make a decision when you purchase, how much am I going to spend.
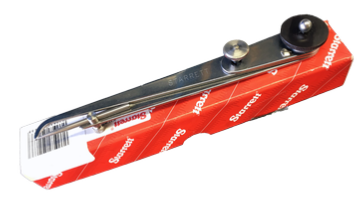
Odd legs of Jenny callipers. Used for marking out steel plate. Actual name for these is ‘Starrett 42-6 Hermaphrodite Joint Calliper, Steel, Flat Leg, 0-6" Range’ They have been absolutely invaluable in accurately marking out. Because they have two very unique features. One, they lock in place, then you can micro adjust them. If you are measuring with ½ to 1mm accuracy you simply do NOT want them to move.
Not cheep at £83 but available again from Amazon. If I remember rightly very difficult to get in the UK, more easy to find in the USA, don’t know why?
The Digital callipers are a must, from sheet thickness to working on the lathe mine are circa 1992 and still going strong, mine you there are Mitutoyo. I did not know it at the time but they are certainly one of the better makes.
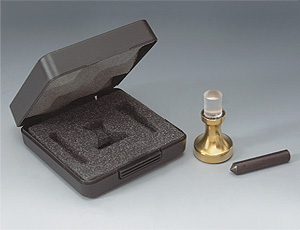
Veritas Optical Centre Punch I wish I had found this a long time ago. I have been using an automatic centre punch for ever, even grinding more of a point on it. But somehow it never seemed to give me the accuracy that I needed.
Then one day not so long ago I found a YouTube video and decided to give it ago.
Gold-plated brass base holds an 8X optical lens used to locate position to be punched.
Replace optical centre lens with an A2 hardened steel punch used to punch workpiece.
High-friction O-ring mounted on bottom of base prevents base movement, while replacing the optical lens with the punch, and using a hammer.
The accuracy achieved using this punch, in my view cannot be obtained in any other way. Buy one!
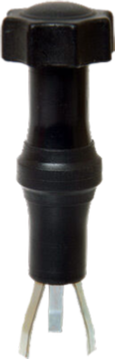
Centre finder for round bar.
Place in the chuck of a drill press instead of the drill.
Place the round bar in the vice, then move the vice at right angles until the pointer is on the line.
Replace the centre finder with a centre drill, drill a small centre hole, replace with the drill bit of your choice and drill away.
I found it ok, but still needed to check by eye!
Found this on Ebay.
Found this on Ebay, and gave it a try, used to quickly check the thickness of steel and aluminium plate.
Also on Ebay.
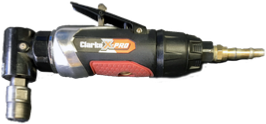
Air tools- these obviously require an air compressor but sometime you you just need to use them.
This is a ‘Right Angle Die Grinder’, it runs between 8000 and 25000rpm, and has 4 speed settings. Great for using with rloc discs, grinding stones , buffing mops , mini wire brush or of course Tungsten Carbide Burrs.
This one was from Machine Mart.
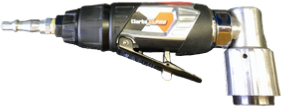
This one is actually an Right Angle Orbital Sander also from Machine Mart. It is designed to run a lot slower but was perfect for the car headlights project. This one has four speeds, 6500 - 9500 - 12500 - and 15000.
This one was also from Machine Mart.
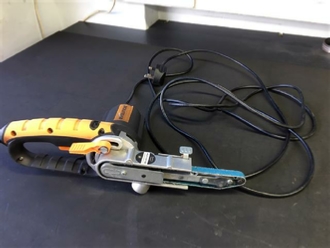
I will cover this one in more detail under Equipment Projects. However, I started using this in place of my Angle grinder, one for more control and two to keep me in with the Neighbours!. Because it is a lot quieter to use.
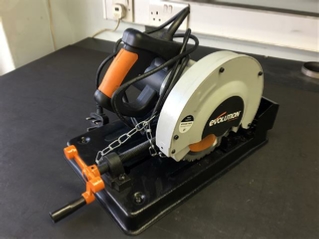
I already have a Evolution Rage 3 saw, however, the problem is trying to cut small pieces. The only clamps on the Rage 3, are vertical and places 6½ inches from the saw blade. So I purchased this one, a 185mm blade and able to cut much smaller stock.
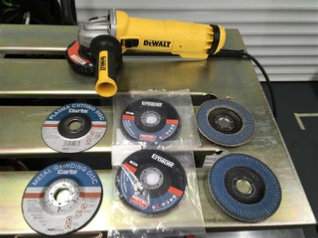
The Angle grinder, the stocking trade of the welder, or is it???? On the welding table is a variety of cutoff, grinding discs, also some flap discs.
Now remember that most angle grinders spin at 10,000 rpm. Have you ever tried to control a wire brush spinning at that speed? I have, it’s not fun. Then I saw the video below, have a look for yourself.
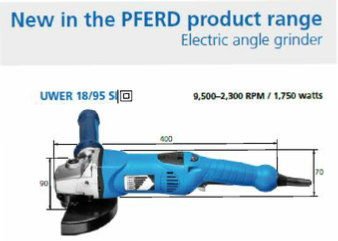
So firstly I got thinking that is a good idea, a variable speed angle grinder.
I started looking for the Pferd one. But simply gave up trying to find it in the retailer in the UK. I think I would have to get it from Germany and the cost was a high £300 plus.
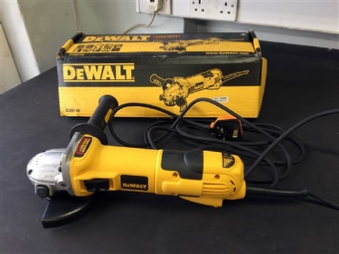
However, not to be outdone I did find an alternative one in Italy, and it was DeWalt strangely enough. They use the same voltage as us in the UK, so it was just a matter of changing the plug. Oh! The cost, well a little pricey at £116.18 but with £61.89 shipping giving a grand total of £178.07
So when it arrived I did change the plug, and gave it a whirl.
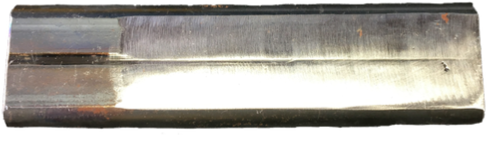
Now I found an old piece of steel that I have previously plasma cut for the bench project, put and out 80 grit flap disc on it and to my astonishment at its slowed speed I got this!
It’s now February and the surface was polished back in November 2018. The finish is really smooth and not what you would expect for an 80 grit disc. So I have high hopes of this grinder, and its a lot quieter when you run it slow as well.
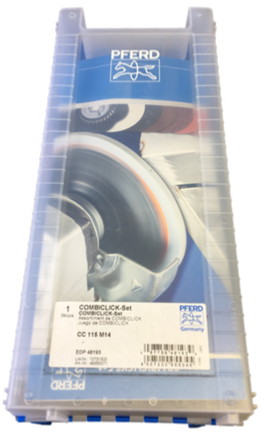
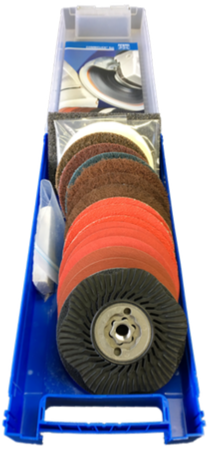
I was very impressed by the steel finish result, so purchased the Pferd polishing and grinding system that you saw in the video
I haven't tried them as yet, but I will in due course.
Now I was looking at some sort of high heat source. Initially HHO, but the problem with HHO is the generator is quite physically large. In fact about 1Mtr long, not to mention a cost of about £1,200. When I was building the Bench which is in this Equipment section, I needed for reasons that are made clear in that section,a very high heat source, and so opted for oxy-acetylene. I decided on a kit from Welders Warehouse. This was the ‘Portapack LD Oxy Acetylene Gas Kit (Premium)’ with additional ‘Cutting Attachment & Nozzle Upgrade £30.00’
Listed as:
Premium Quality Kit for Portable Gas Welding & Brazing. Ideal for light duty industrial or home use. This torch is physically smaller and lighter than the Heavy Duty Unit and so offers greater dexterity on light work.
Comprises:
Premium Portapack Trolley, Premium Victor Oxygen & Acetylene Regulators + Flash Arrestors, 5M Hose Set with Check Valves, Light Duty Shank & Mixer, 4 Welding Nozzles (Nos 1, 3, 5 & 7) and a pair of Goggles. Does not include Gas Cylinders.
Trolley accepts BOC Cylinder Sizes:
Oxygen E + F
Acetylene K + M
Total cost £359.83

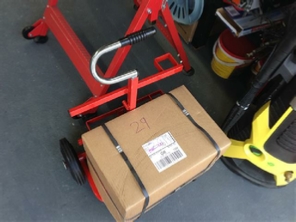
The Box arrived and I set it up.

Check out this video from Welders Warehouse out this kit.
Now I feel it’s time for one of those doom warnings.
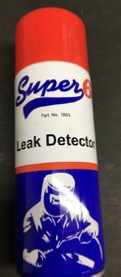
You MUST test new system for leaks before using it and then again as time goes by. But do not use any form of soapy water with oxygen as it might explode. Remember ‘Do not use soapy water or solutions containing grease or oils on oxygen systems’ Use a proprietary leak detector spray, like the one on the right.
Always fit flash arrestors, and follow this code of conduct when using oxy equipment:
First - before you attempt to light the torch follow these checks:
Make sure regulator pressure adjustment screws are backed out!
Make sure torch valves are closed!
Stand away from front of regulator
Separately and slowly open the oxygen, at lease 3 turns, or all the way, the acetylene cylinder valves, MUST only be opened a MAX of 1 turn.
Adjust regulator p/a screws to tip pressure settings
Open/close torch valves separately and fine tune pressure settings on regulators, acetylene should an MAX of 6 or 7psi.
Depress cutting lever and adjust pressure if necessary
Lighting and adjusting the torch (with a positive/equal pressure mixer):
Separately purge both oxygen and fuel gas lines
Open fuel gas valve 1/2 turn
Ignite flame with striker
Increase fuel gas flow until flame leaves end of tip and no smoke is present
Decrease until flame goes back to tip
Open oxygen valve and adjust to neutral flame
Depress oxygen lever and make necessary adjustments
Shutting down the torch (with a positive/equal pressure mixer):
Close oxygen torch valve
Close fuel gas torch valve
If the torch/regulators and gases are done being used for a while, follow these procedures:
Close oxygen and fuel gas cylinder valves
Separately purge oxygen and fuel gas lines
Make sure all regulator gauges read 0
Back out regulator pressure adjustment screws!
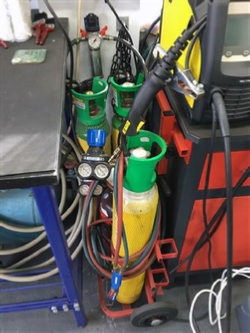
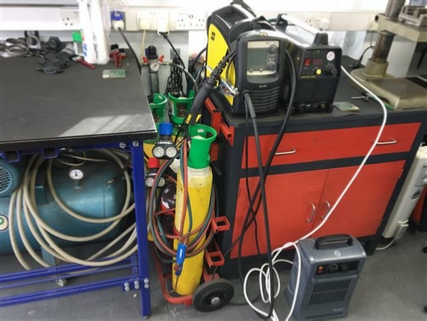
As you can see I have just a few gas bottles. The Oxy kit is in the front, the two cylinders behind are Hobbyweld the one on the right is Hobbyweld 15 (83% Argon, 15% Carbon Dioxide, 2% Oxygen) and one on the left is Hobbyweld for Stainless Steel (98% Argon, 2% Carbon Dioxide) this will stop the weld being contaminated by to much carbon and keep it stainless.
After seeing these results I also found this Pferd videos:
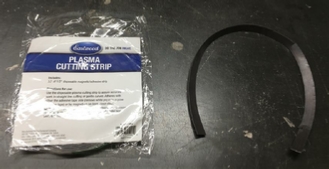
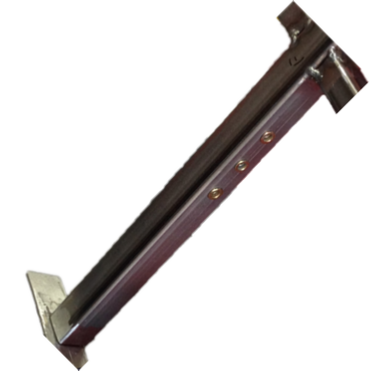
One item that I did find a use for after importing from the USA Frost was this plasma cutting strip. The picture on the left shows a length of the strip after using it to cut the top section whilst doing my modifications to the belt sander. Very useful for those gentle curve cuts.


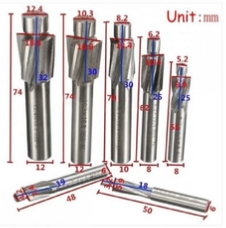
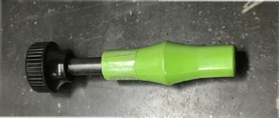
This was a project I needed to get done, for which I found I did not have the right tools. It’s a simple converter to place this pilot end mill in my drilling machine.
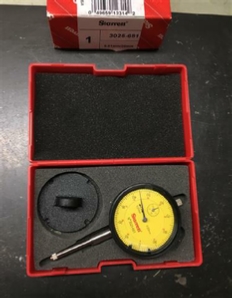
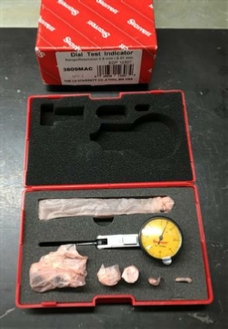
The problem was how to tell if the alignment is correct. What I need was some dial gauges. Now these things are not cheap. However, I think that these from Starrett are a good compromise.
The gauge on the left is a ‘Starrett 3025-681 Dial Indicator Range 20 mm Graduation 0.01 mm Dial Reading 0 to 100 Yellow Face’ available from Amazon at £67.44.
The gaauge on the left is a ‘Starrett 3809MAC Dial Test Indicator with Dovetail Mount,4 Attachments, and 2 Extra Contacts, 32mm Yellow Dial, 0.8mm Range, 0.01mm Graduation
’ again available from Amazon at £86.22.
If you are going to use a Lathe especially if using a four jaw chuck you will definitely need these, and don’t forget the magnetic base on the right! This was from Amazon £25.

So lets talk Nuts! Now I see a lot of welding projects, where people are welding zinc plated nuts. Did you know that this has the potential to cause you serious health problems.
Here are the official words on the matter:
The process of welding galvanized steel is commonly found in the metal fabricating industry. Many welders usually weld galvanized steel at some point in their career; and in doing so they may experience galvanize poisoning or metal fume fever. Galvanize poisoning is a condition that results from the over exposure to zinc oxide. Zinc oxide forms when the steel’s galvanized coating evaporates from the high heat used in welding
Galvanize Poisoning
Symptoms of galvanize poisoning can be similar to flu symptoms. The onset of symptoms typically begin shortly after exposure to zinc oxide and may include a mild headache and nausea. If you have a more severe case of exposure, your symptoms will be consistent to those you experience when you have the flu. A moderate case of exposure will result in symptoms including chills, shaking, a slight fever, vomiting and cold sweats. If you begin to experience any of these symptoms you should immediately stop working and get some fresh air. In severe cases the symptoms may be so bad that you will have to go home until they subside. The most severe cases of galvanize poisoning can result in death. If you feel that your symptoms are worse than ever before, you should seek medical attention at once.
Galvanize poisoning is often short and your symptoms should begin to lessen within four hours of exposure. You should be completely symptom free within twenty four hours. If you experience a stronger exposure, you may still be experiencing symptoms up to forty-eight hours later. We recommend upon exposure that you drink milk in order to quicken your recovery. The calcium in milk helps remove the zinc build-up from your body.
Now I am not saying for one minute that welding a couple of zing plated nuts is going to create such a problem. I just wanted to make you aware if the issue if you did not know about.
But why risk the issue in the first place when you don’t have to? I will share with you a secret, that only you and I will know!
Weldnuts, that's it? The secret is now out!
Now I’ll bet you have no idea what I am talking about, right. Well I discovered this little known secret some time ago, and have never looked back. How many times do you need to bolt things that you are fabricating? I would wager quite a few times, and you also need to align the nuts with the bolt right? Weldnuts have the answer!
For a start they are all mild steel not coated, so that is one problem solved. Now the other secret is that these nuts are designed to be placed by machines onto the panels before being welded. So have a registration ring on the back of the nut.
Have a look at the picture below:
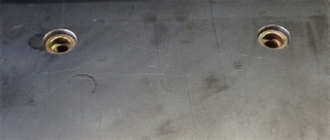
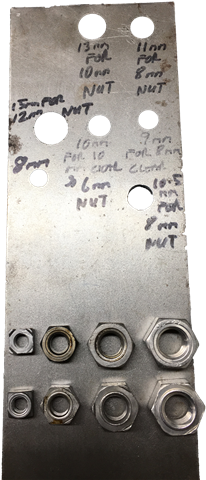
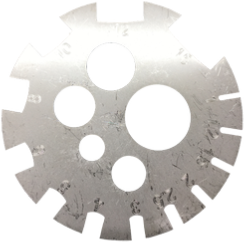
I drilled this plate to remind me of the sizes of the holes that I had to drill for each weld nut to be centrally located within each hole the sizes are as follows:
6mm weldnut 10mm hole
8mm weldnut 11 mm hole
10mm weldnut 13 mm hole
12mm weldnut 15 mm hole
Here are some Weldnuts in person!
If you look closely you will see the locating rings that will fit inside the holes that you drill.
So now you know the secret on the Weldnuts.
This one is not so much a secret as something that I have only just found out about Rivnuts, and with them Rivbolts.
I have used Rivnuts on two of my projects, one was the removable mount for my Ring Roller, and the other was the Dart Board project.
If you have to screw a bolt into a blind hole, or one that you cannot place a weldnut on the other side how to you do it?
Use Rivnuts of course!
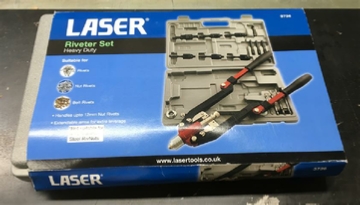
They fit like pop rivets, in fact the same machine can be used for both and the Rivbolts as well.
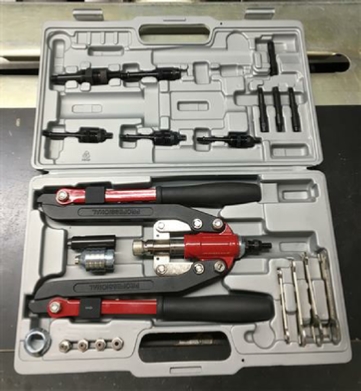
I picked the Laser machine because it was one of the most comprehensive kits I could find.
Now Machine Mart seem to do this set, but they are notoriously bad at updating their website, there Laser 3736 kit seems to be the old version with only a three spanner set in the bottom right hand corner, however this may now have been updated. I purchased mine from Amazon, which has the four spanners as you can see. So just be careful which one you purchase.
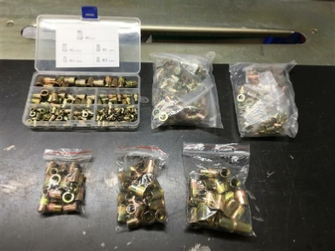
Don’t forget the Rivnuts you can get these pretty much anywhere these were from Ebay.
They are also available in Steel, Aluminium and Stainless steel.
I tend to use only steel.
You will also need the larger rivet gun if you are going to use 12mm Rivnuts, although this Laser gun will not do 12mm in Steel but NOT 12mm in Stainless.
I have tried in the section, although rather long, to give a bit of an overview of what tools I have purchased over the last two or three years in setting up my New Workshop. They are not the only choice, just my choice.
I find that any purchase is a compromise between quality and price. You want the best that you can afford, but remember the old adage ‘buy cheep buy twice’. Also remember safety please don't compromise on cheap products here, you could lose more than you bargained for.
I have purchased a lot of products from my local Machine Mart, had some really good purchases, remember if you register with them at certain times off the year they will send you a card for VAT free purchases on Clarke product, and 10% off other brands. This is normally for purchasing on a Sunday, but well worth the savings on those larger products.
Just watch out for that picture on their website, sometimes the product is actually newer than the picture on the site. This happened to me with their large vice, the picture of the product is still not the actual product.
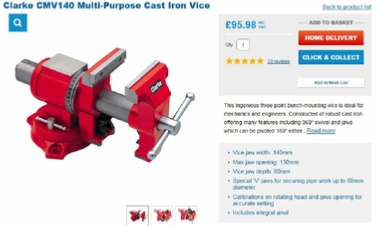
So as you can see this is what was advertised in Feb 2019, they quote three point fixing and only one tightening screw on the right which you can’t see. This is the older version.
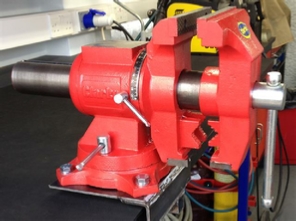
In fact this is the newer version which I purchased from them nearly two years ago! It has four point bench fixing and not three, and it also has two sets of tightening screws for horizontal rotation as well as two sets for the vertical.
An exceptional vice, well worth the purchase.
My best advice is go along to your nearest store and have a look for yourself, register and get those VAT free shopping days days.
As you will have realised by now I make a lot of purchases using Amazon and Ebay. I have purchased tools, nuts bolts and even large pieces of steel projects. So far I have not had any real problems, If you do, just send a polite e-mail making sure it is sent through their site’s own email system, and not direct to the supplier. In that way you can be assured that your complaint is registered. Also being polite, tends to get you the best outcome, always!
For my steel I use The Metal Store. Free delivery if you spend £70, and free cutting up to 10 cuts per item. I have used these guys for every large project so far. Their cutting is accurate to with 1mm, and they have a wide range of products on offer and much better on price that either Ebay or Amazon. Except you will most probably get more steel than you need, but that can only be good. Remember, your next project is always just around the corner and having more steel in your scrap bin is the way to go.
My advice is give them a try.
Now I will be adding more companies to my list of the ‘good guys’ as I go through the Equipment Projects so watch out for them.
Chris

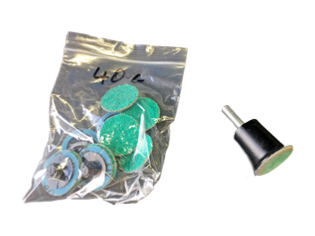
These are Roloc discs and are great for cleaning up steel, just snap them on to the head.
Available in Fine, Medium and Course grit’s.
I used the Rivnuts on two projects the one on the left was for securing the hinges on the Dart Board project.
The one above was for the Ring Roller quick release bench mount.
When you need them, you need them, take it from me!

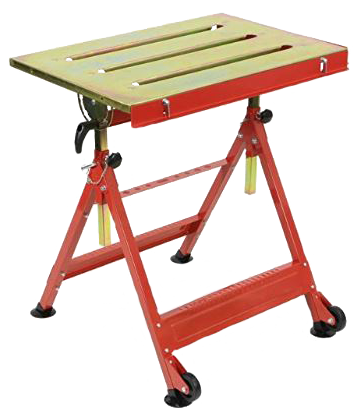
You might has seen this table in some of the pictures. I purchased this to get me off-the-ground. However, I must say that I have used it in every welding project that I have done so far. Purchased from Amazon you can find it here:
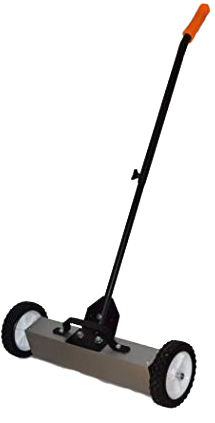
Another piece of kit well worth investing in is this Wolf 18” (457mm) Wheel Mounted Magnetic Pick Up for a Workshop. This is currently unavailable from Amazon.
This is one of the best devices for picking up steel swarf from the workshop floor, especially if you use a Evolution Rage metal saw.


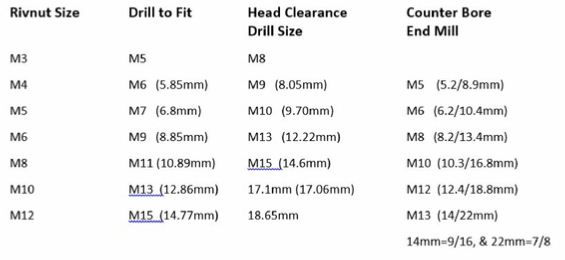
I have put together a quick chart of the drill sizes and Counter Bores that you might need when working with metric Rivnuts.
You can also download as a .pdf here.
| Rage 3 Saw |
| ESAB Welder |
| Cros-Arc Plasma |
| HHO |
| Spot Welding |
| Betty's Gates |
| Car Headlights |
| Julia's Dartboard |
| Outside Light Base |
| Weather Vane |
| Geoff's Gates |
| Loft Hoist |
| Colin Laser Mount |