


Web Site by cg-photohraphy.co.uk


This was a very interesting project, long time friend and work colleague Linda, brought round a weather vane.
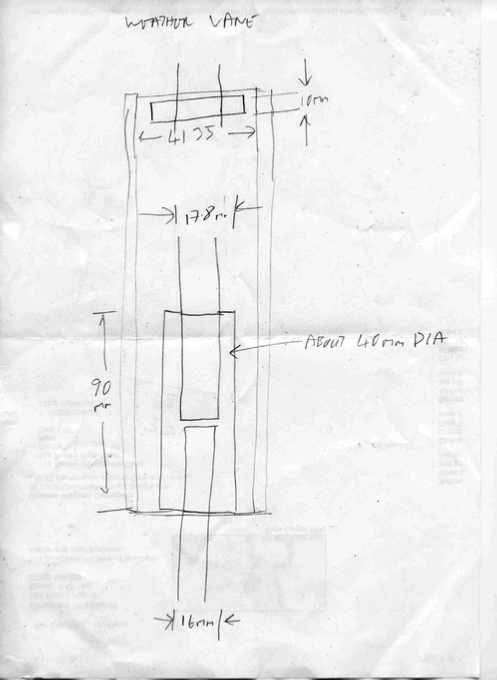
The weather vane was in a good condition, but had no pole fixing. This is what Linda asked me to do, construct some sort of fixing that could go between the weather vane and their garage where they wanted to mount it. They also wanted the fixing to be about 1Mtr tall.
I visited them and had a look at where it was going to be placed, and noticed that it would also have to clear the cladding, so would have to be offset by 8cm.
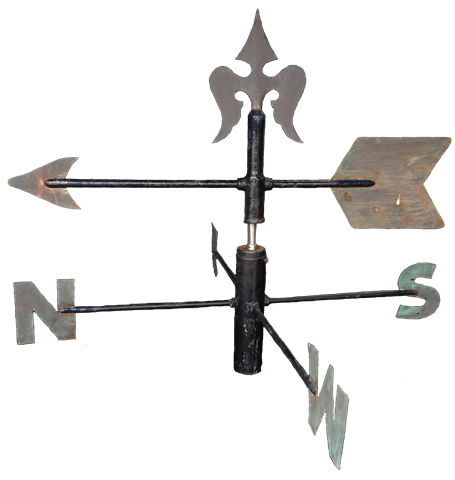
The weather vane looked Victorian to me, you know the sort of thing that has been painted many times over, over the years.
Weather Vane
Project Date: 8 Aug 2018

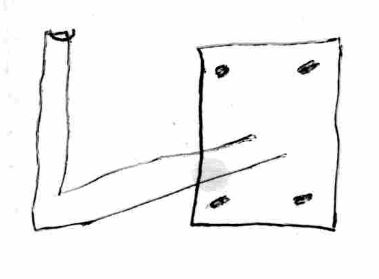
This was the idea I was given for the mount, I thought I might be able to design something a little better, more practical and safer.
See comments below in 3a) and 3b).
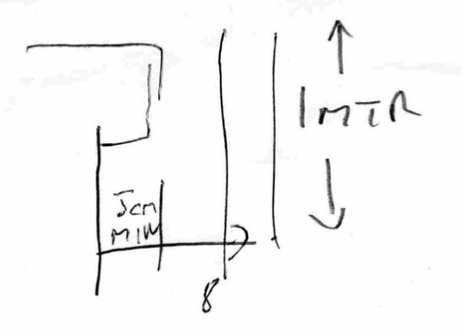
These were my notes, about the height and offset for the mount.
This is the weather vane, my instructions from the ‘client’ were clear. No restoration was to take place on the weather vane itself, just produce a mount, and a pole 1Mtr in length.
The vane was made of cast iron, the central pivot was so rusty I had to turn it in the lathe to try and clean it up. That was also interesting as I suspect it may have been cast, so did not run very true.
The central pivot, now cleaned up and repositioned for the picture.
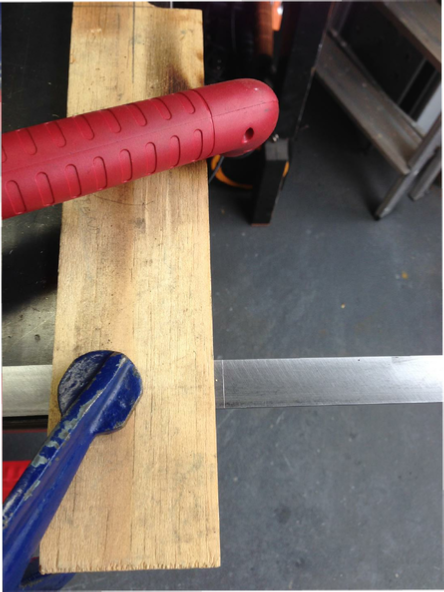
Now there was one problem, can you see that mounting screw? When this vane was designed, the central mounting pivot (the silver part), was just tightened against this screw. This splayed the end of the screw out, and so I could not remove it.
This meant having to cutting it out, from the inside!
Now you might ask ‘why mess about with that screw, just throw it away’?
Well you know I am always banging on about being sympathetic to a restoration. Well this is where it starts. Save that screw because it is part of the original unit!
I also needed to fix this issue to stop it happening again.
As I see it we have three issues:
1, Join a 1Mtr long piece of steel to the weather vane’s original pivot, so that it can be used as a mounting pole.
2, Fix the issue of that screw taking the full weight of the vane, especially as you need to adjust the declination (simply making it point N,S,E and W)!
3, Create a suitable wall mount for that pole, keeping the design sympathetic to what we originally had.
I am going to add some comments about the wall mount.

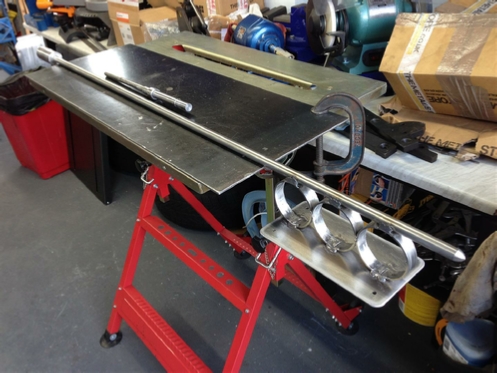
First of all we need to cut the steel to length, so it’s out with the trusted Cros_arc plasma cutter, what else?
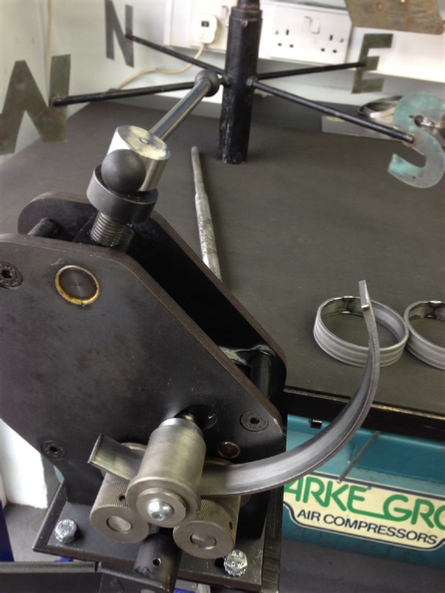
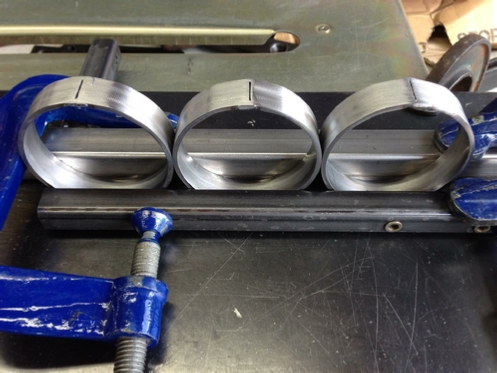
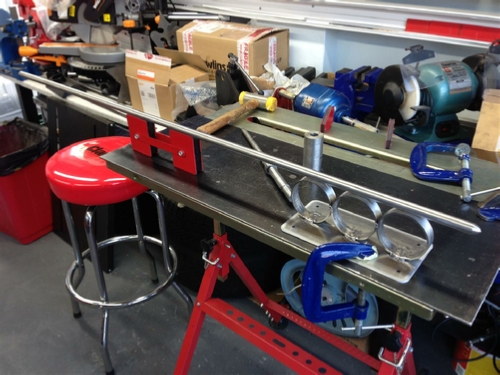
We now need three steel rings, so it’s out with the ring roller.
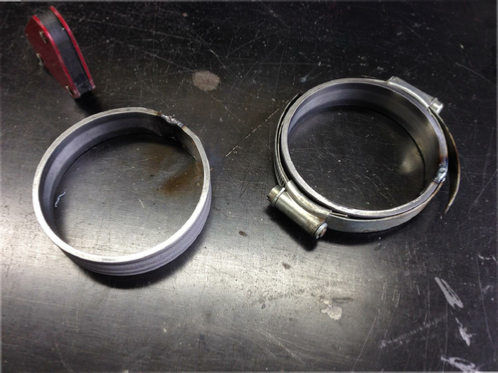
One trick that I have learnt is to use large Jubilee clips, or in this case two put together, to hold the ring closed as you welding it?
Tightly clamp all three rings together before welding them.
They absolutely must be in a straight line.
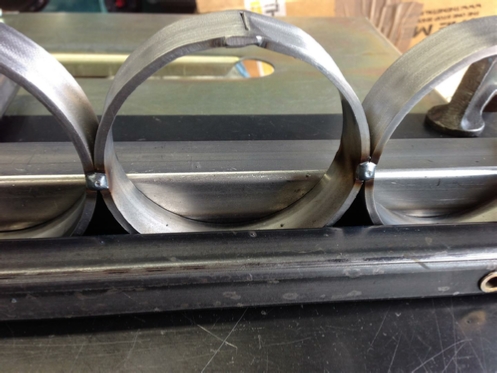
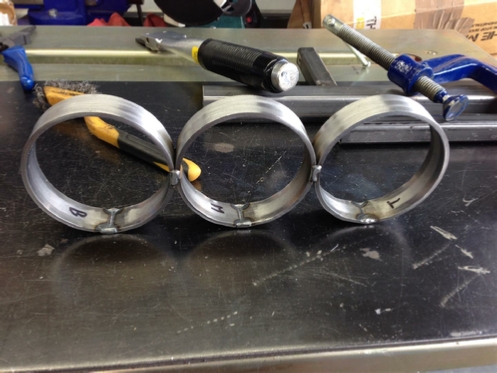
Looks good so far.
Even better with those clamps removed.
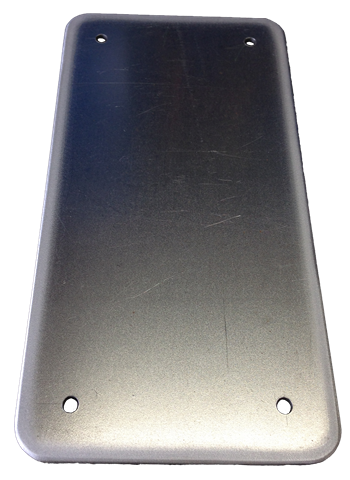
I found a piece of 3mm steel plate, plasma cut it, rounded the corners, and drilled four 6mm fixing holes.
The plate was polished on my linisher, looks too good to paint?
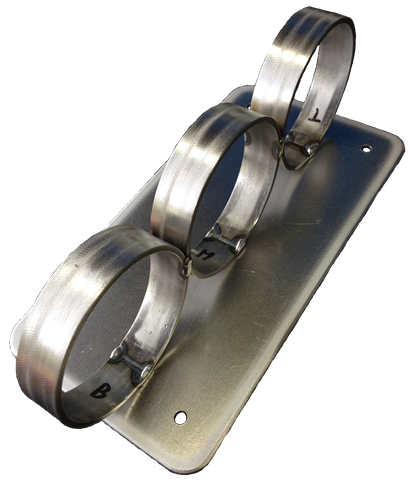
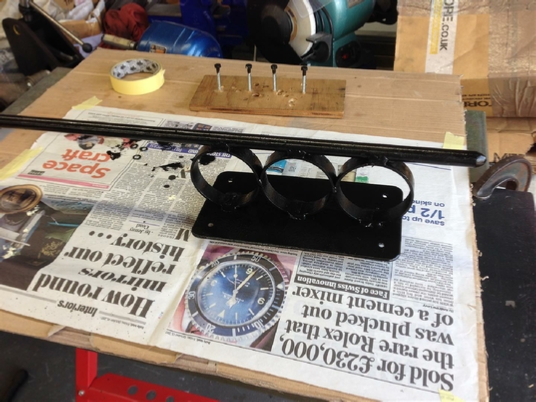
Time for a fit up, the steel rings placed onto the mounting plate.
Now to get it welded in place.
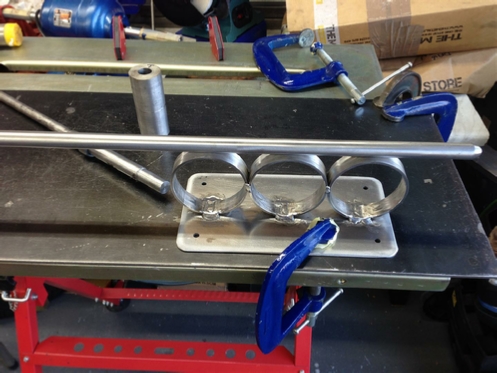
Having welded the rings to the base plate.
It’s now time to weld on the bright steel ‘pole’, and it MUST be level.
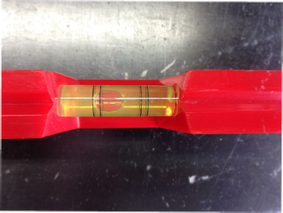
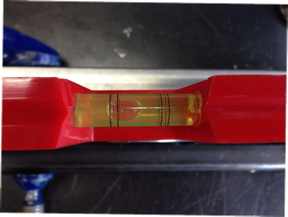
Now here is a little trick! Place a spirit level on the table and take a reading.
Then place the spirit level on the work piece they should be the same?
The table and the ‘pole’ are the same, so they can be welded together!
Close up shot.
Safety?
Safety is one very important consideration, with anything that you design and build!
This weather vane is reasonably heavy, and it’s going to be blowing about in the wind, it will also have a lot of ‘whip’ from the length of the pole, as it is going to be 1Mtr in length.
Any sort of single point fixing is never going to work, even if it is welded. What you need is a mount that can flex. Take the example of the tree, if the branches don’t bend they will break, so build this way of thinking into your project.
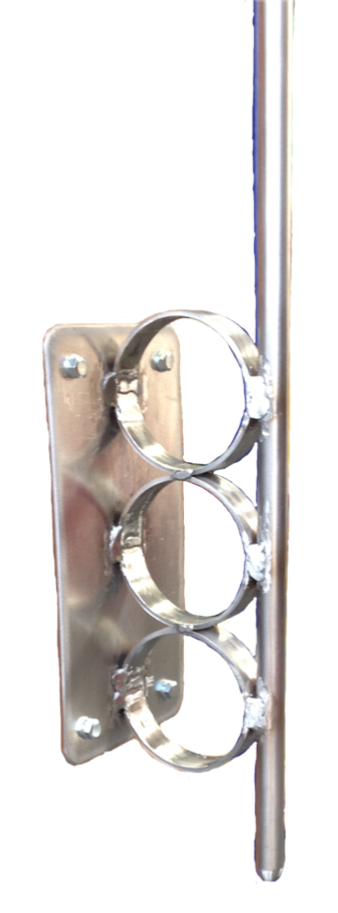
The three ring design that we are going to use will meet the criteria of flexibility, and provide that offset from the cladding on the wall. It will also provide multiply weld points for attachment to the base, and the same for the steel pole, making it all much safer in use.
Don’t just use materials that are cheap to purchase, purchase materials that are going to be safe in use!
Water?
Water going into any building is obviously very bad. When you design any sort of outdoor mounting, where is the water going to run off to when it is raining? Again take this into consideration with your design.
When we make this mount, the pole is going to be allowed to hang down from the three ring fixing, in that way any water will run down to the end of the pole, and not back into the building!
At this point not having any steel for this project in stock, I went along to see the guys at one of my favoured places, ‘Home and Workshop Machinery’.
This visit did not disappoint. I returned with a nice length of 5/8 bright steel rod, and about a 1Mtr of bright 3 x 25mm steel bar. Perfect!
Now as for the design, I am thinking Rings? Well I do now have a very nice ring roller, don’t I?
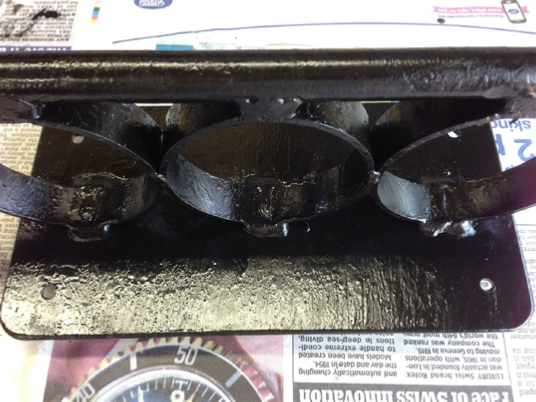
Steel pole, base and rings now all welded together.
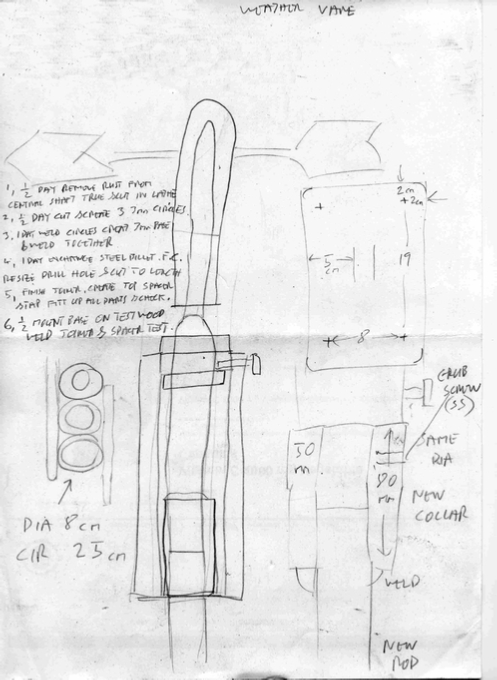
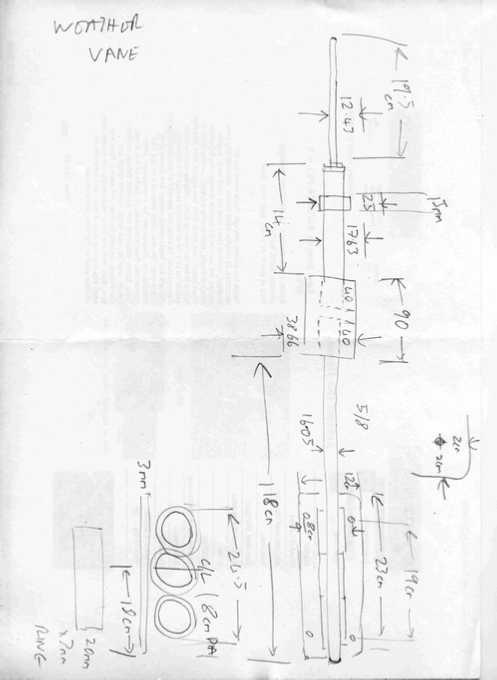
These are my notes of what we have.
We need to make a joiner to join the original weather vane pivot to the new steel pole.
Like this (left), and also find a way to resolve the issue of taking the weight of the weather vane on that brass screw?
I think we can fix this by turning a steel collar, and fixing it to the original pivot, we can then ‘hang’ the declination part of the vane on that.
If this part is made with a grub screw we can use that to adjust for the height, before tack welding it in place.
Two other things need to be considered when adding a joiner between the original weather vane pivot and the new steel pole.
Either keep the holes in the joiner different sizes or DO NOT drill all the way through.
I did both.
In this way you will stop the whole thing falling apart if any of the tack welds should fail.
So why not fully weld them? You know my view on that, besides if for any reason this Victorian weather vane needs to be returned back to original, only two tack welds need to be removed!
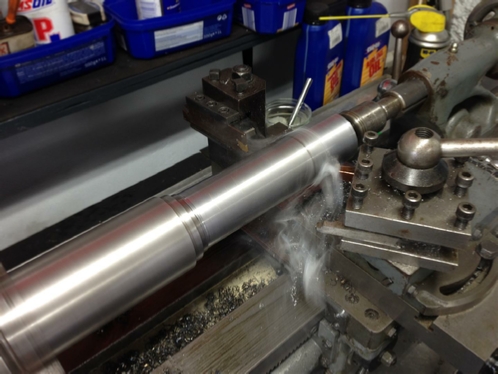
Turning that spacer, on the lathe.
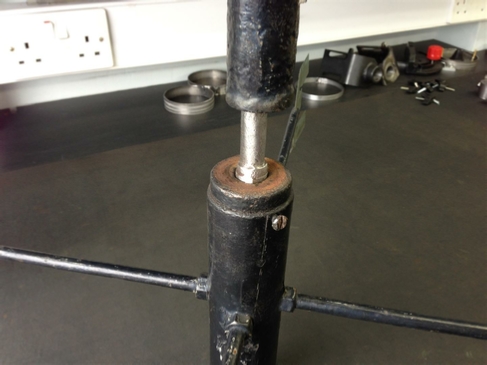
This is the original pivot with the collar now in place. Notice the collar is tack welded at a higher point than the joiner to support the full weight of the weather vane, when fitted onto the shaft
Close up of the joiner and collar.
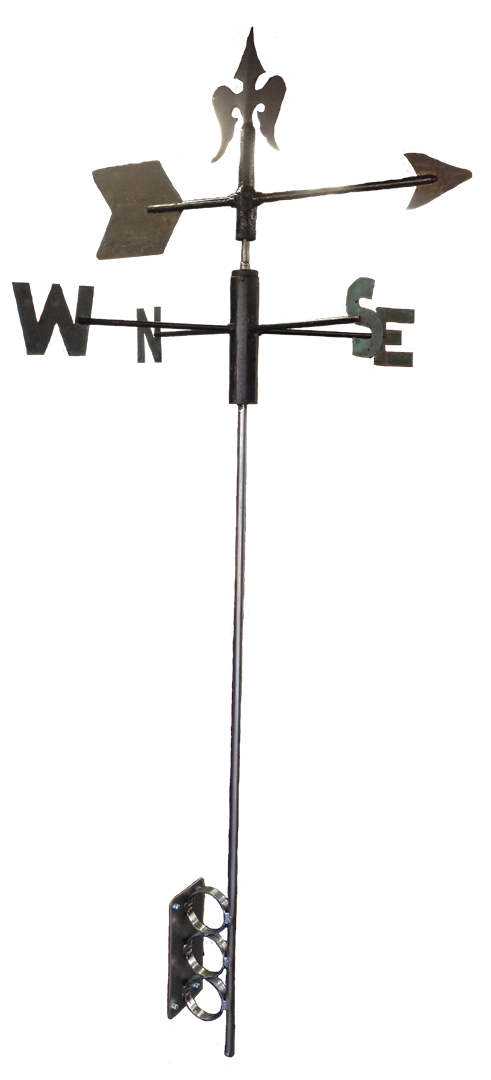
Original weather vane with wall mount fitted.
Close up detail of wall mount.
Time for some paint, Which seems a shame as the steel was looking so nice.
However, it would not stay that way for long, once the weather got at it!
Notice the coach screws in the background, also being painted.
I used a ‘dry paint’ technique here, to give the effect of it being painted many times.
This keeps the base looking like it was made at the same time as the weather vane.
This technique was helped by the temperature which at the time was 32 degrees!
All you have to do is have very little paint on the brush, and go over it many times, to build up the layers.
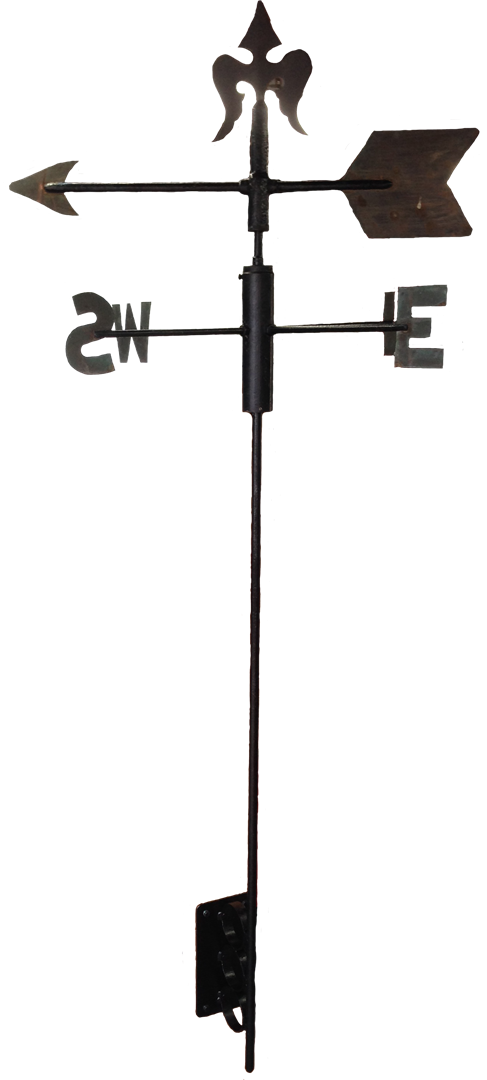
The finished weather vane in the workshop ready to go to the client.
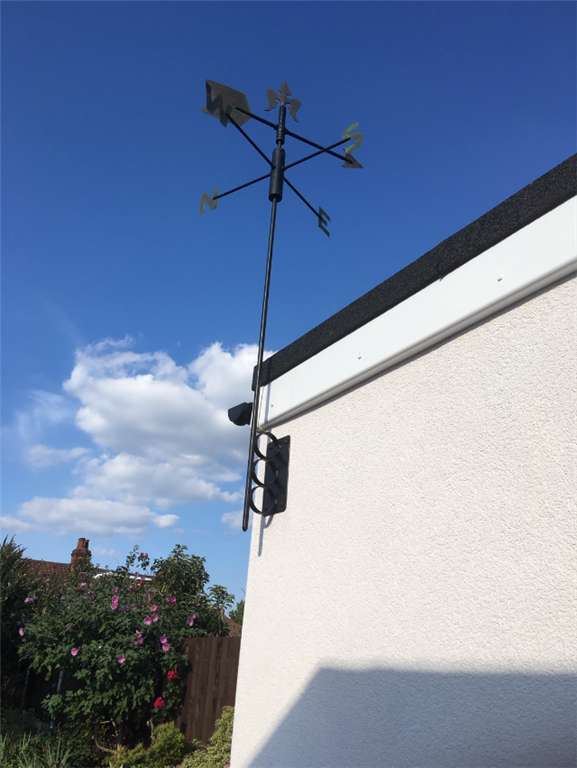
This picture was sent to me by the client, the weather vane now attached to the building, and in use.
My client Linda and her husband were very happy, with the finished product.
It just goes to show what can be achieved by doing a sympathetic restoration, and what happens when you get right!
| Rage 3 Saw |
| ESAB Welder |
| Cros-Arc Plasma |
| HHO |
| Spot Welding |
| Betty's Gates |
| Car Headlights |
| Julia's Dartboard |
| Outside Light Base |
| Weather Vane |
| Geoff's Gates |
| Loft Hoist |
| Colin Laser Mount |