


Web Site by cg-photohraphy.co.uk


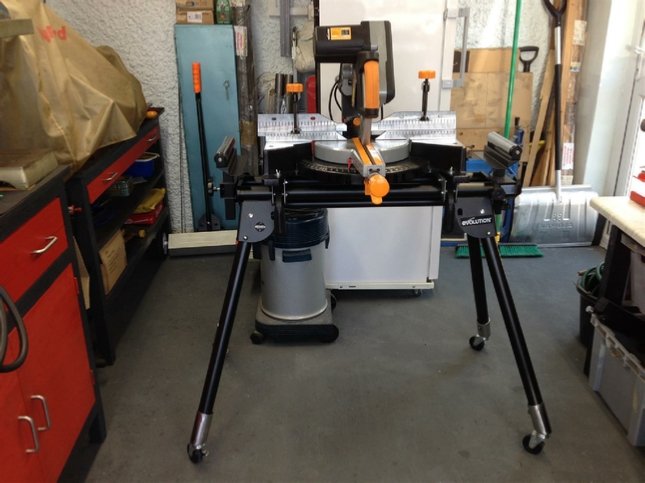
I purchased an Evolution Rage 3 Compound Mitre Saw, mainly to cut the front cross member for my bench project. It has the ability to cut compound angles. In other words it can cut in two directions at once! It is also super heavy duty and will cut 100mm steel beam, check out the Rage 3 Saw page. However it needs somewhere to go? It can sit on a bench and comes with its own left and right work supports. But for those big jobs, you need to get the saw stand. Which is fine it’s only about £50. See pictures below:
Evolution Wheels & Wiring Upgrade


The saw weighs in at 21kGr has a 2000w motor has a 255mm blade, it also has it’s own laser cutting guide. If you want to see the manual it is here.
And this is the Evolution table, it has some really nice roller supports at both ends which can slide ‘in-and-out’ and both have height adjustments as well.
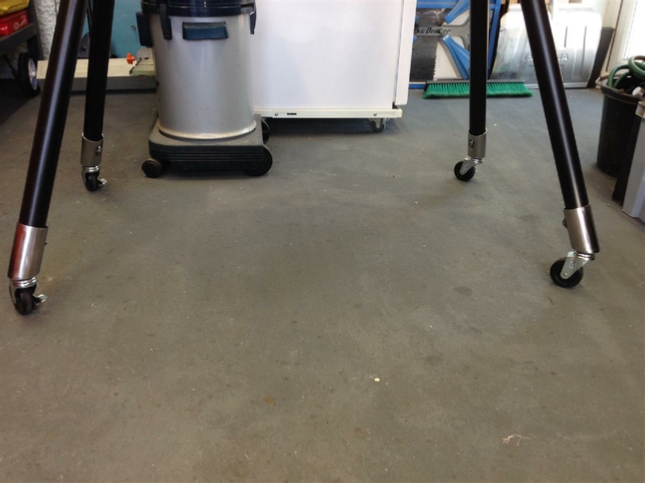
So far so good, however do you notice one thing missing?
Where are the wheels?
Now I know what you are thinking, it’s a saw table, the last thing you want when using a saw like that is to have it go walkabout right?
Well wrong actually!
So why it that then? You already know that my new workshop is actually a single garage. Think about it like having a caravan, small but needing lots of space that you don’t actually have!
So you have to be interactive with what space you do have, right? Hence the wheels, it you need to clean up after using this saw, and you will because it throws small steel shavings everywhere, especially on the floor.
Now think about that, if it had wheels, just wheel it out that way, and if you need to make some space to do something else in the workshop, you can do the same, perfect, so wheels it is then!
Now one of the things that is important to me, is to be sympathetic to what you already have. I have seen some people, just weld things on, instead of keeping things original and intact. I suppose it would be very easy to try and just weld some sort of plate to the legs of the stand and then weld the wheel onto that, and make a right ‘dogs dinner’ of the whole thing.
Well that is not my style, if I design an addition to something it should not hurt what was there originally, it should complement it, and that is what we are going to do.
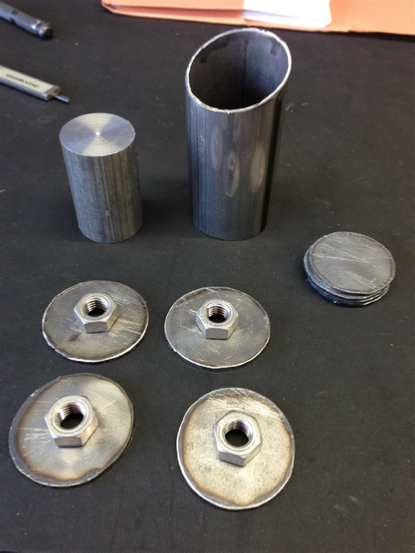
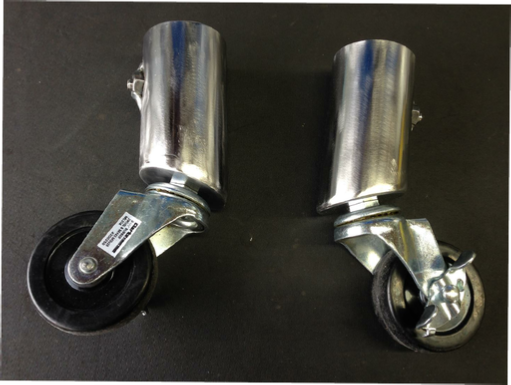
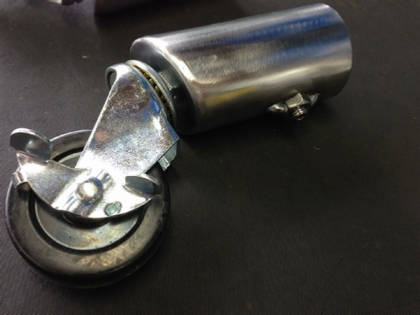
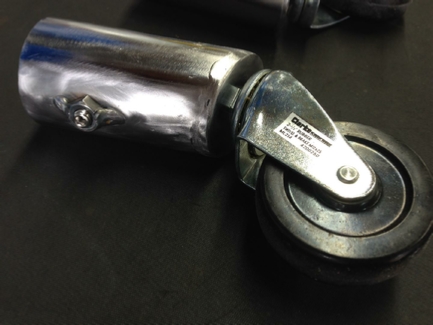
What we have are round legs, at a compound angle, with large round rubber feet at the end. So what we want is a tube, to go over the leg, with a plate at the right angle to allow a locking wheel swivel.
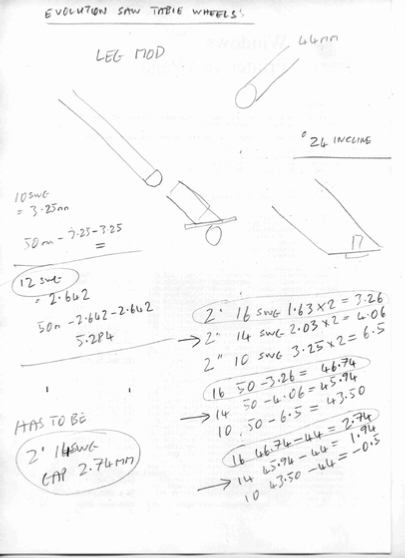
This is a page from my notes, you can see the basic design idea. A tube, for the leg to fit into, a plate welded on the end to attach the wheel to, cut at the right angle.
The sizes at the bottom right is where is was checking out the stock diameters to allow the leg to fit inside a tube.

This second sheet has a more perfected design, using a wheel that has a single fixing bolt.
However, I thought, if I do that the rubber foot would be resting on the end of the bolt that the wheel is fitted to, and that might damage it.
The final design is at the end of the sheet.
A steel tube, with the end cut at an angle of 20 degrees, a plate welded inside to allow the rubber foot to rest on it, and then another plate, this one would have to be cut in the shape of a oval, to bolt the wheel too, as the leg as at an angle.
I think we are going to need that Cros-Arc plasma cutter again!
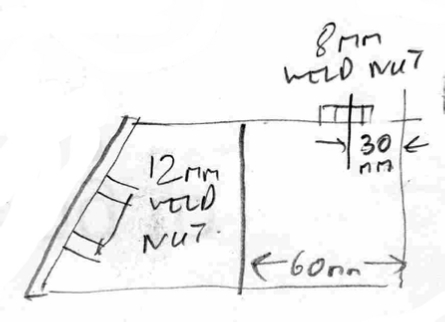
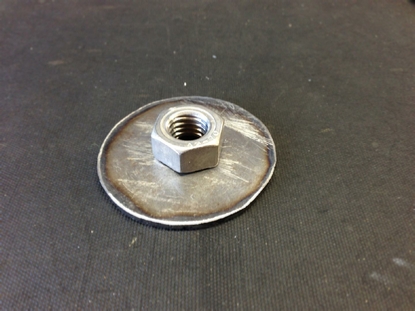
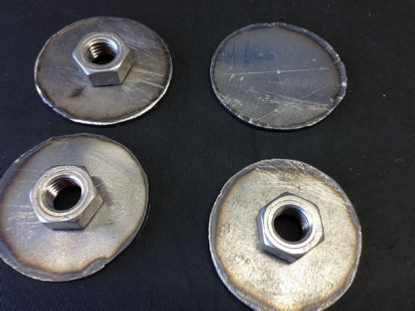
Here is that final design, oh and don’t forget that weldnut, well we just had to have one of those didn’t we?
I decided to add the weldnut to allow a grub screw to just ‘nip’ the leg into place so that I could assemble the wheels to the table in an upside down position, before turning it right side up.
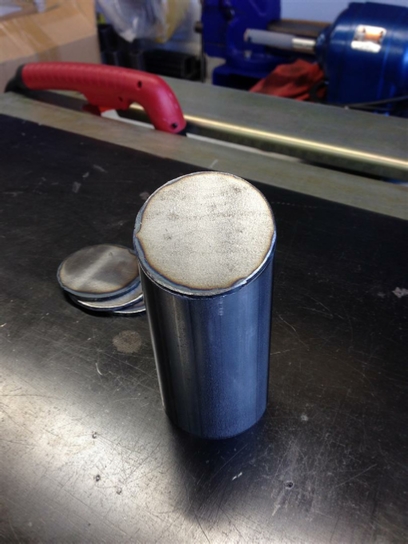
By the way the steel tubing I settled on was 50mm x 14swg.
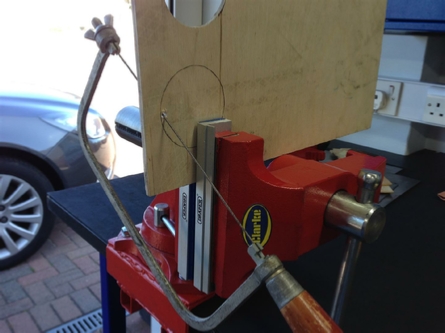
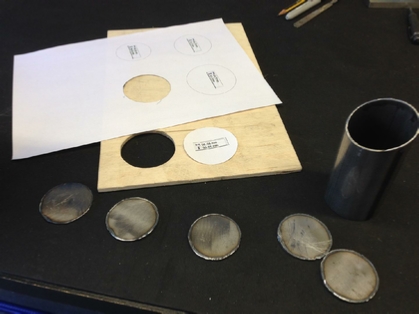
First of all I did some quick CAD/CAM and drew the inner steel circle of 56.66mm and a oval of 64.79 x 61.50mm printed them on the computer and then transferred the dimensions to some plywood. Don’t forget that these dimensions need to take into consideration the distance from the centre of your plasma cutting head, to the outside edge! Because you are cutting inside the circle you have created.
Then cut them out using my Abra saw, you could use a Jewellers saw, or a fret saw.
Notice that Clarke’s vice coming in rather handy.

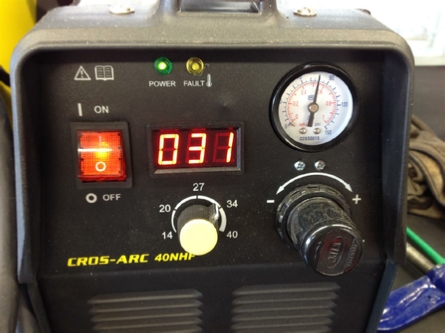
Time for a little plasma cutting I think..
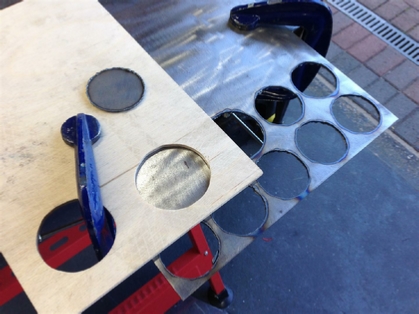


Pretty much a perfect fit to the CAD/CAM size.

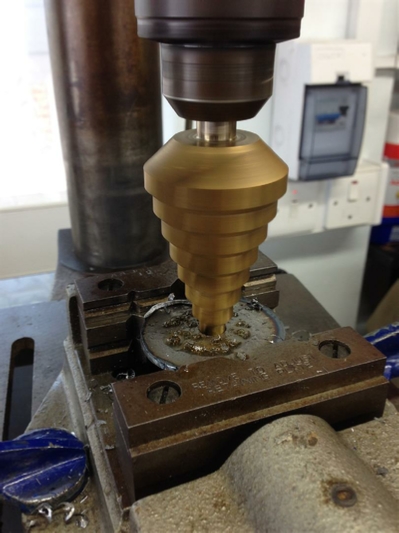
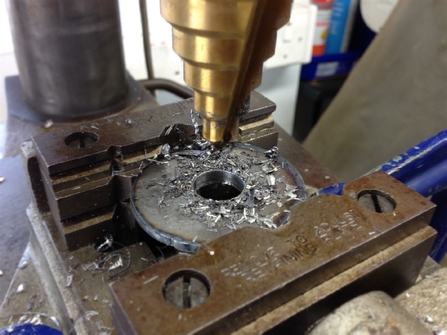
Using a step drill to cut a hole in the oval plate to weld the weldnut to, to mount the wheel.
Notice the piece of aluminium, this has been cut to just the right size, to allow me to position it inside the leg tube to hold the steel plate at just the right depth, so I can weld it.

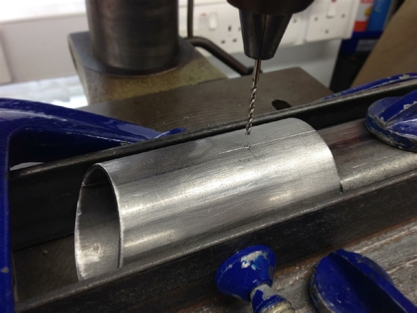
Here I am drilling the hole for the weldnut, to hold the grub screw. Notice the steel tube has already been drilled with a centre drill, this will stop the larger drill slipping.
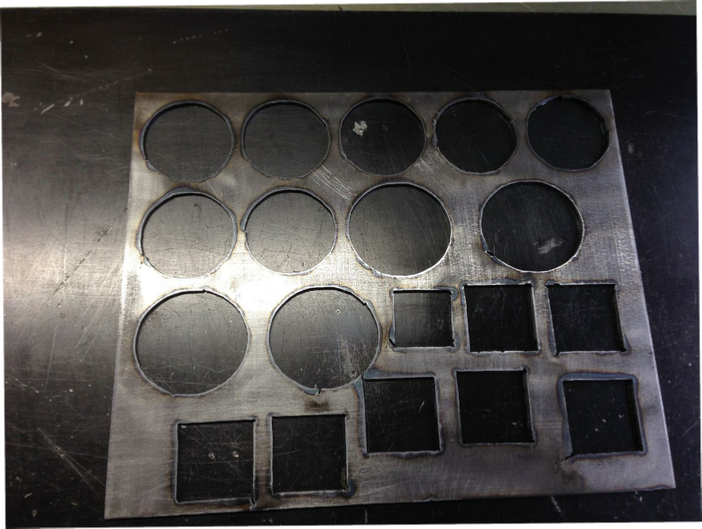
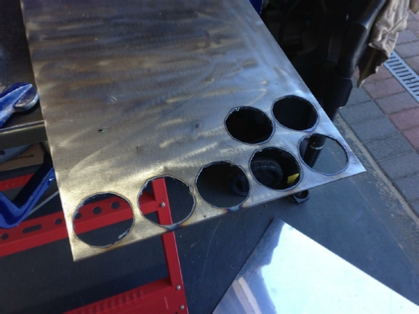
I wanted to show you this, this is the 3mm steel that I use for all of the plasma cut plates.
Do you notice anything?
Each of the hole cuts, were perfectly cut, no wastage, no bad cuts. The Cros-Arc plasma cutter is definitely earning it’s keep. By the way the square holes are coming up on the next project, Belt Sander Wheels, so stay with us!
Time to get those Grasshoppers out and fire up that welder!
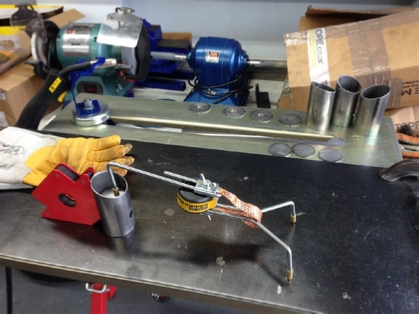
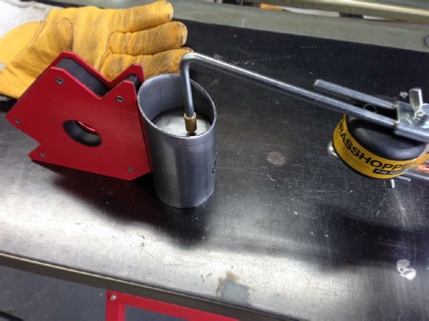
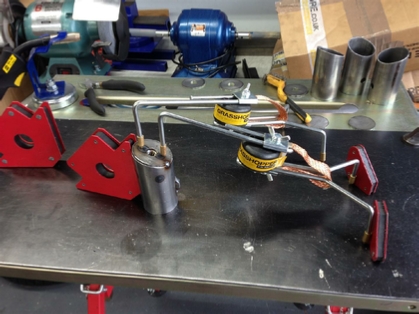
I am using that aluminium spacer inside the tube to get the correct height to weld the steel disc at don’t forget.
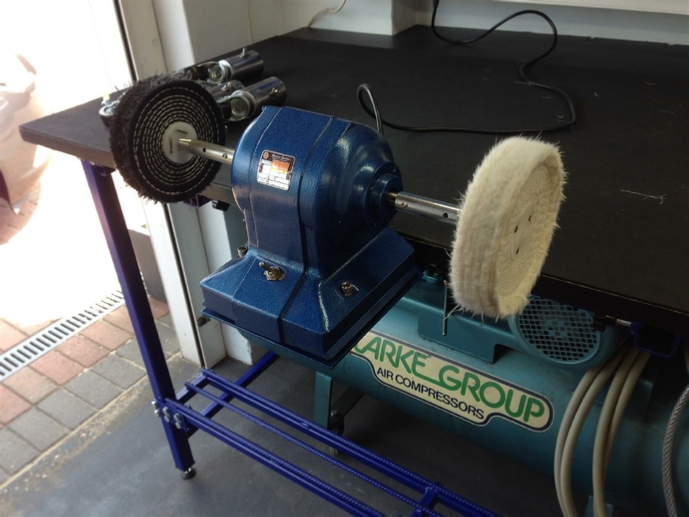
Remember that linisher and those Clarkes polishing wheels from the last project? Well I am now going to use it on the wheels that I have welded, to give them a nice finish.
One of the last things that I did was to replace the mains lead, I don’t know what it is about these companies using short leads on things? I purchased a 5Mtr mains lead which included a moulded plug, removed the old lead, reconnected the new one, and then PAT tested the saw, to make sure it was ok.
I know that if I needed to return the unit under warranty I would have to swap it back, but this is ok.
I think that there are a number of observations to make with this project:
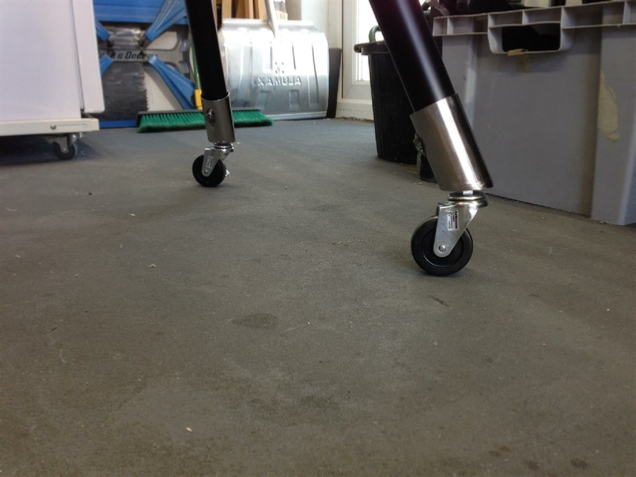
It’s interesting that although the wheels are locking, I have never locked them with the saw in use. However, that is no excuse for not fitting them in the first place.
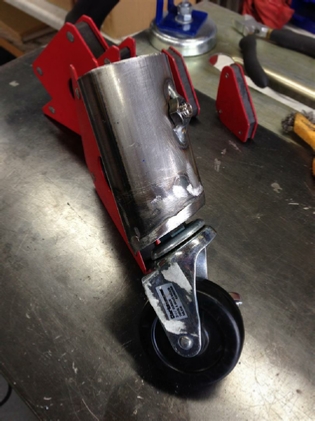
The fantastic shine that I got from using the linisher, with a quick coat of wax on the wheels, has stopped the steel from rusting, and it has been nearly a year since finishing the project.
The wheels have been so designed to be completely removable, without leaving any damage to the original saw table legs.
Finally this project like many others could not have been completed without the use of that Cros-Arc plasma cutter.
Another project down!
Project Date: 24 May 2018
| Rage 3 Saw |
| ESAB Welder |
| Cros-Arc Plasma |
| HHO |
| Spot Welding |
| Betty's Gates |
| Car Headlights |
| Julia's Dartboard |
| Outside Light Base |
| Weather Vane |
| Geoff's Gates |
| Loft Hoist |
| Colin Laser Mount |